In this tutorial I will be showing you how to create a composite image using various elements that will come together to make a unique Steampunk design. We will be using the Pen Tool, Layer Masks and Adjustment Layers, and doing quite a bit of Photo Manipulating throughout the tutorial. We have a lot to cover today so let’s get caffeinated and begin!
Final Image
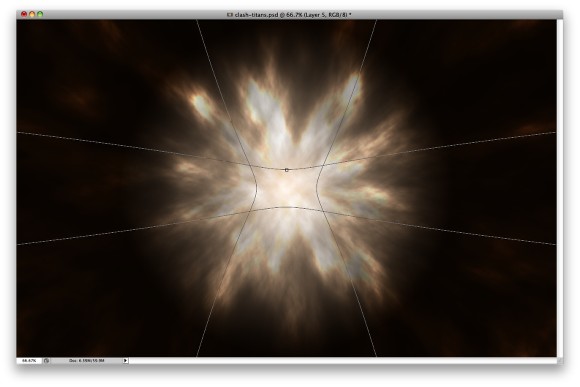
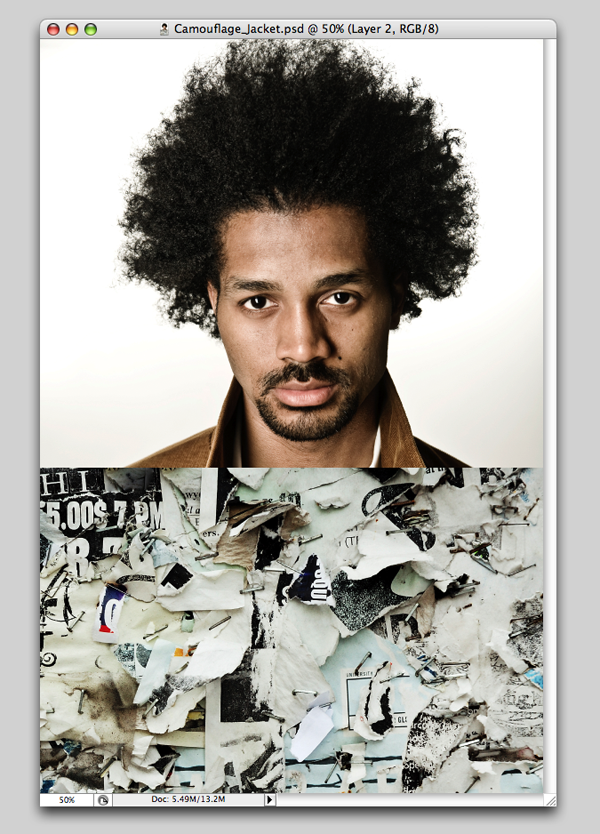
Here is a preview of the image that we are going to be creating:
Step 1
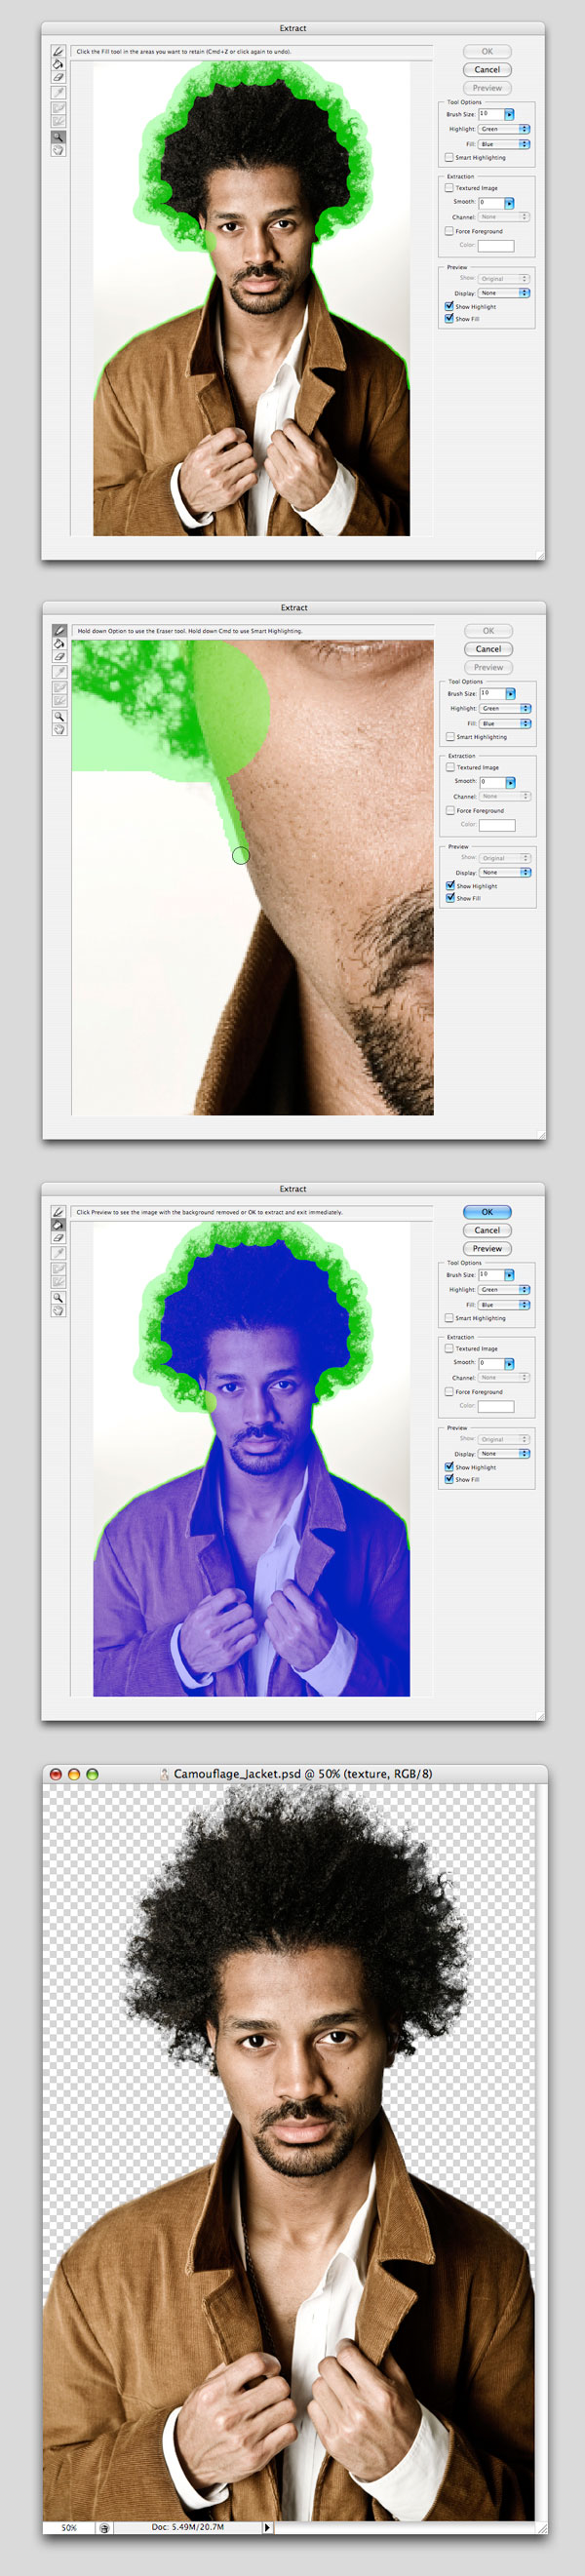
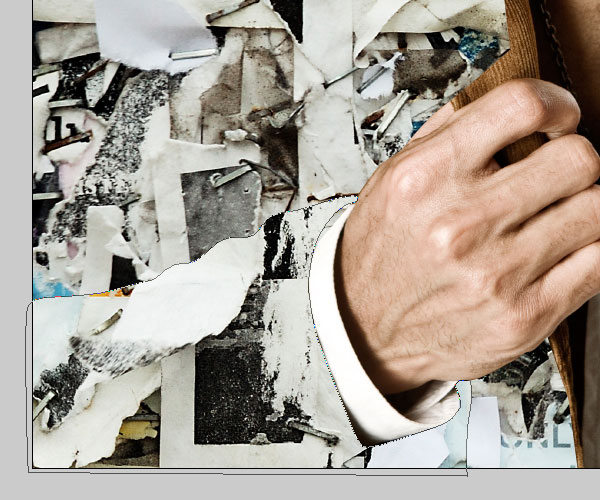
First off we want to open up the model image from the Resources > Images folder. Once the image is loaded, double click on the “Background” layer to unlock it. After that, press Command/Ctrl + J to duplicate the layer. Turn the visibility of your original layer off, and then click on the Layer Mask icon indicated in the image below to add a mask.
Switch to your Brush Tool (B) and make sure that you have a large, hard, round brush with a solid black fill color selected.
Using your brush, begin to paint into the background of your image and you should see it begin to disappear as you mask out the larger, extraneous areas around the model.
In order to work faster, I usually go back and forth between this method of silhouetting an image and using the Pen Tool, which we are about to implement in the next step.
Step 2
Before we move on I just want to point something out about masks and working with them. When you observe your Layers Palette you will notice that there is a small frame that appears around the thumbnail icon of that particular layer that has a mask applied to it. In the image below, take note of the difference:
The image on the left shows that you have your mask selected, and the image on the right does not. This can trip up a lot of people when they begin to work with masks, and for the remainder of the tutorial I will refer to this as the layer mask thumbnail icon. After making selections you need to make sure that you switch to this if it isn’t already selected in order remove parts of that image and not end up simply painting black or white the on the image.
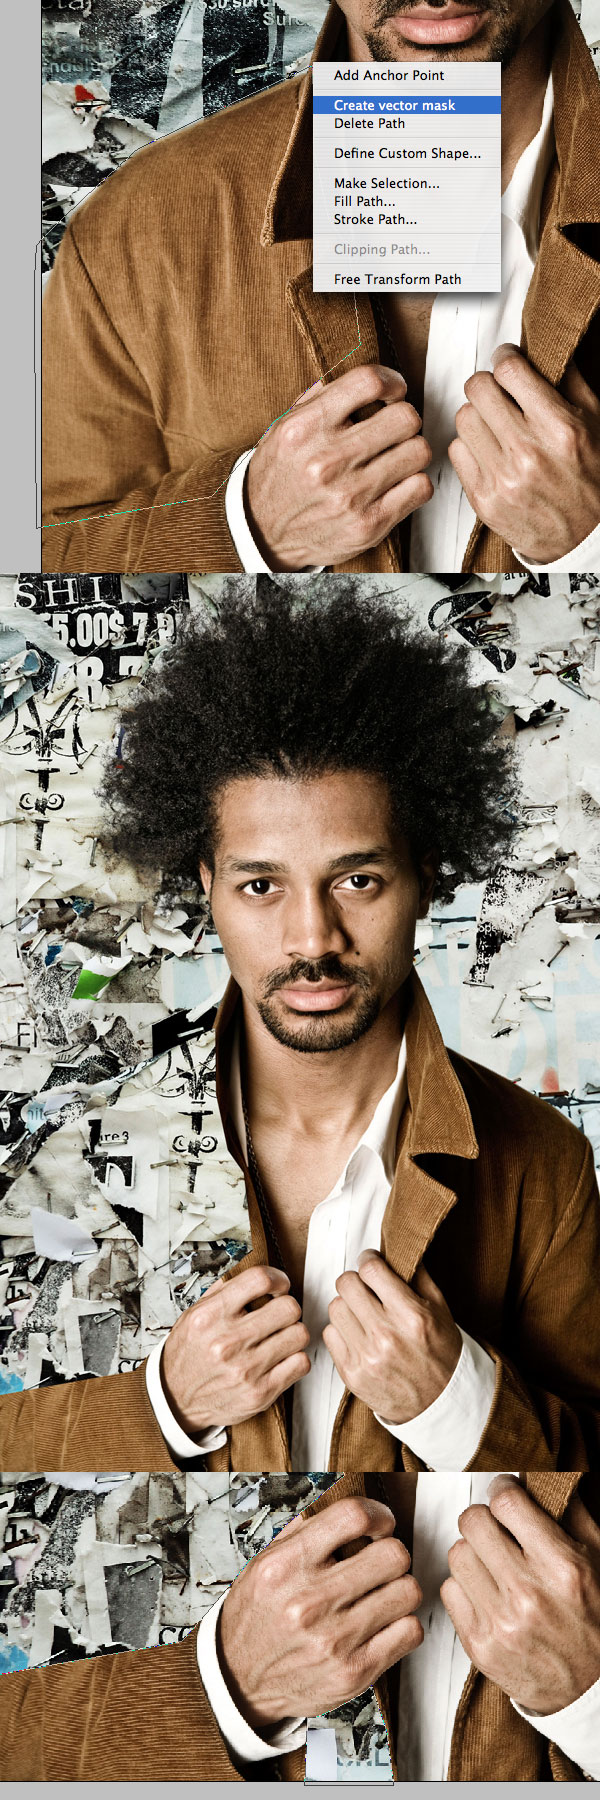
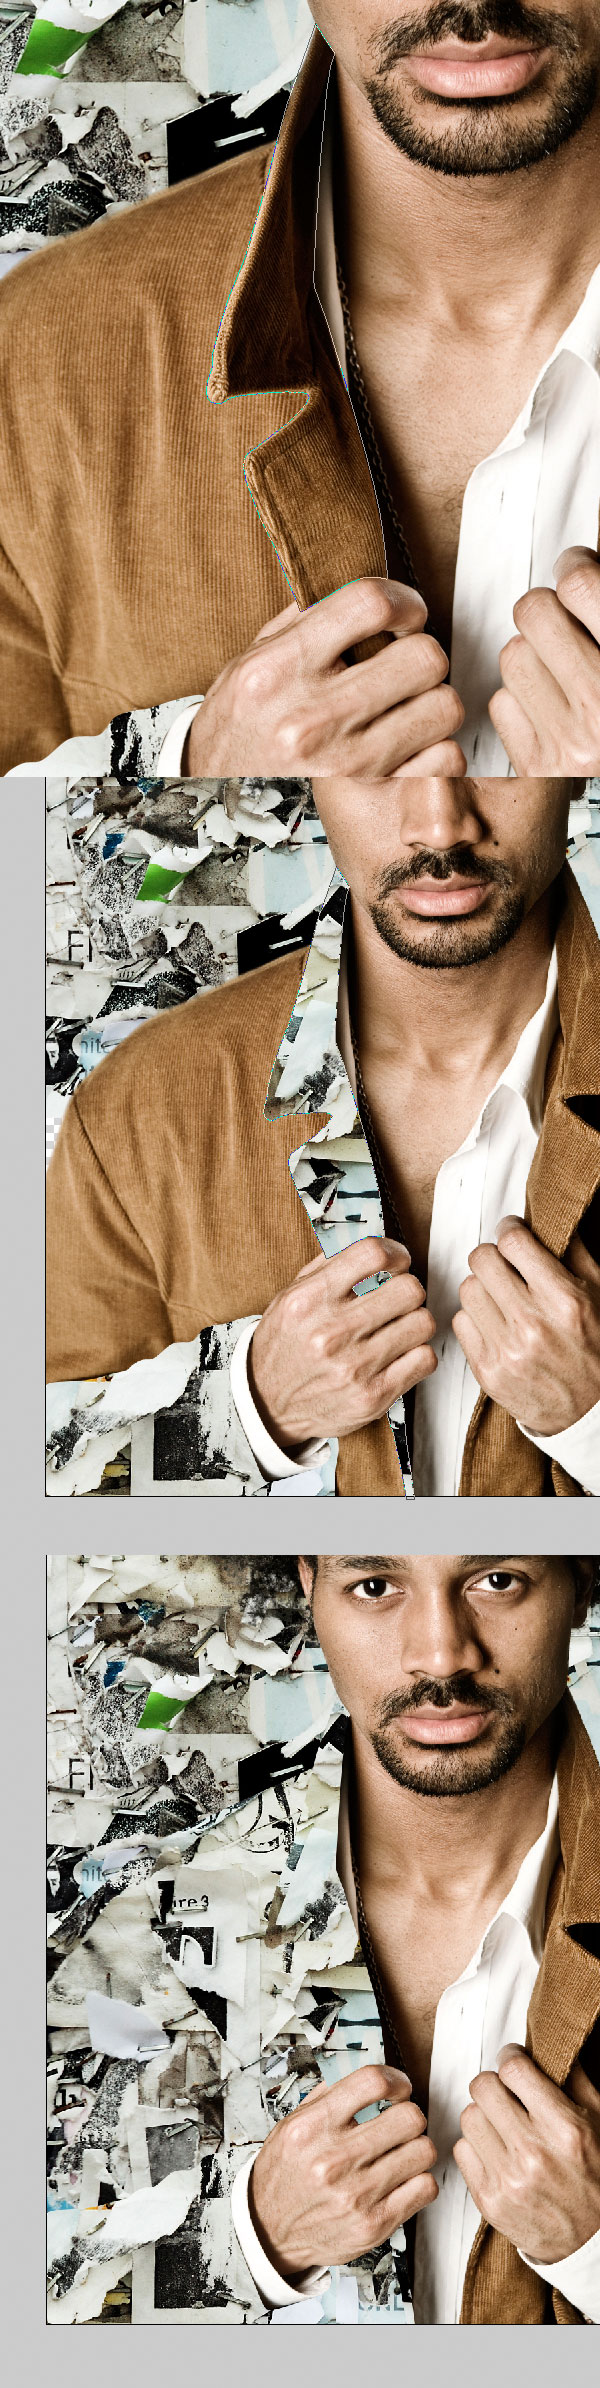
Next, switch to your Pen Tool (P) and zoom in closely to your image in order to begin to trace around the contours of the model.
Once you have finished tracing a section, close the path and while holding down the Control Key, click anywhere along your path to reveal this dropdown menu:
From here we want to choose “Make Selection” and when the next dialog box appears, simply click “OK”.
The marching ants will indicate the area that you have selected, and now you can switch back to your Brush Tool (B) and paint into the area to remove it from the image.
Step 3
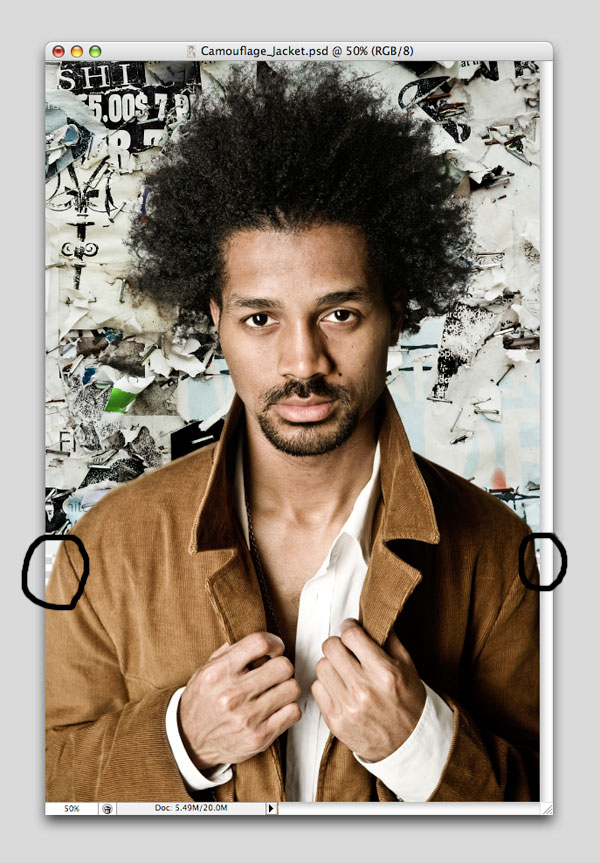
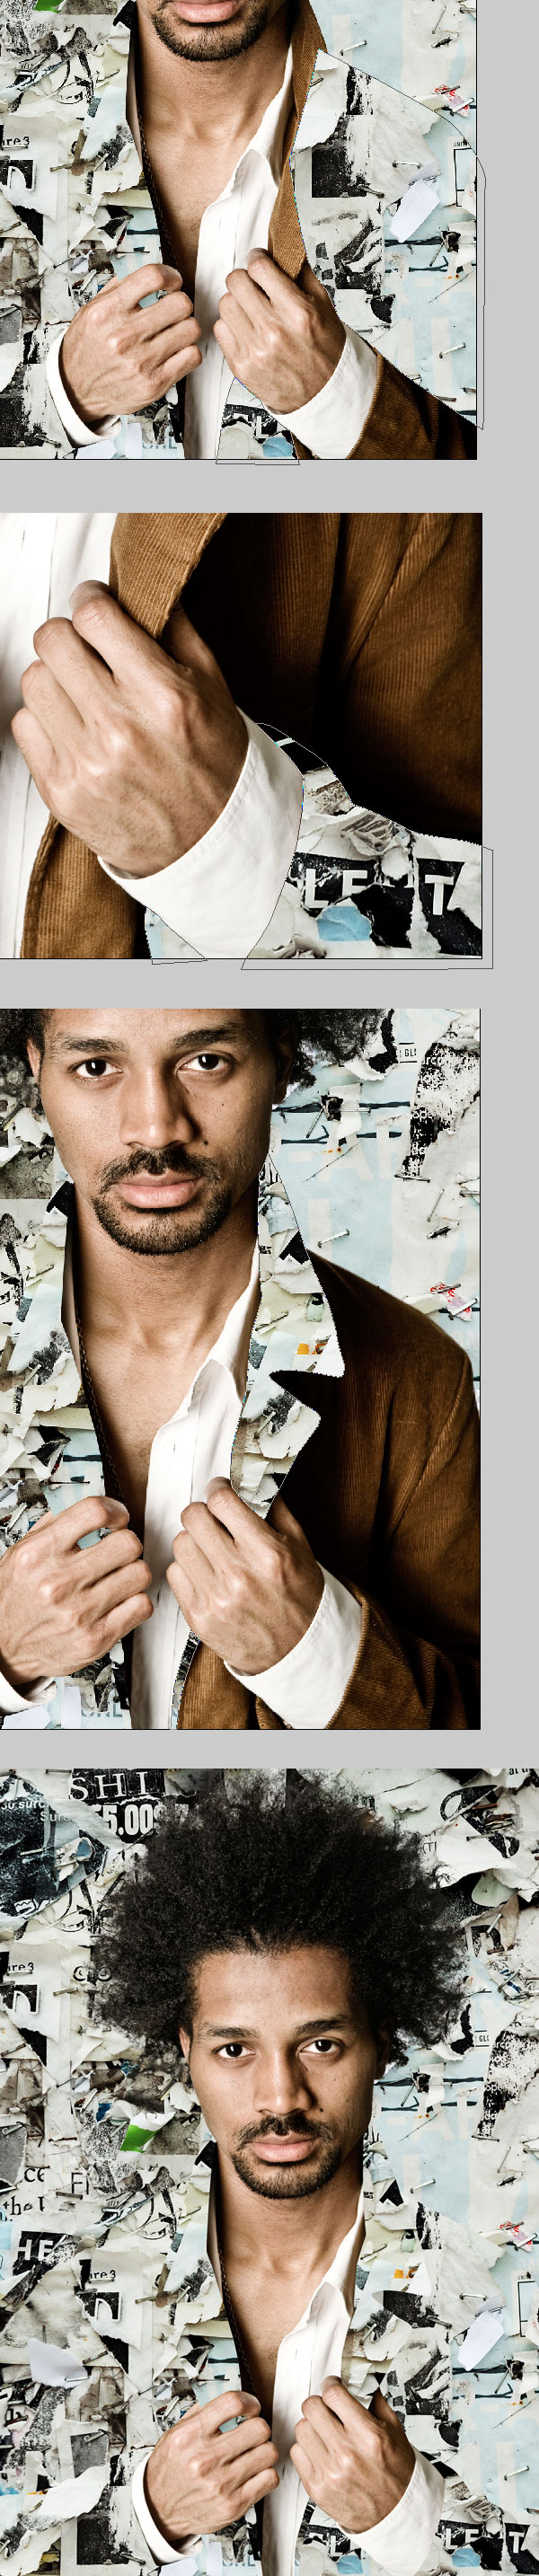
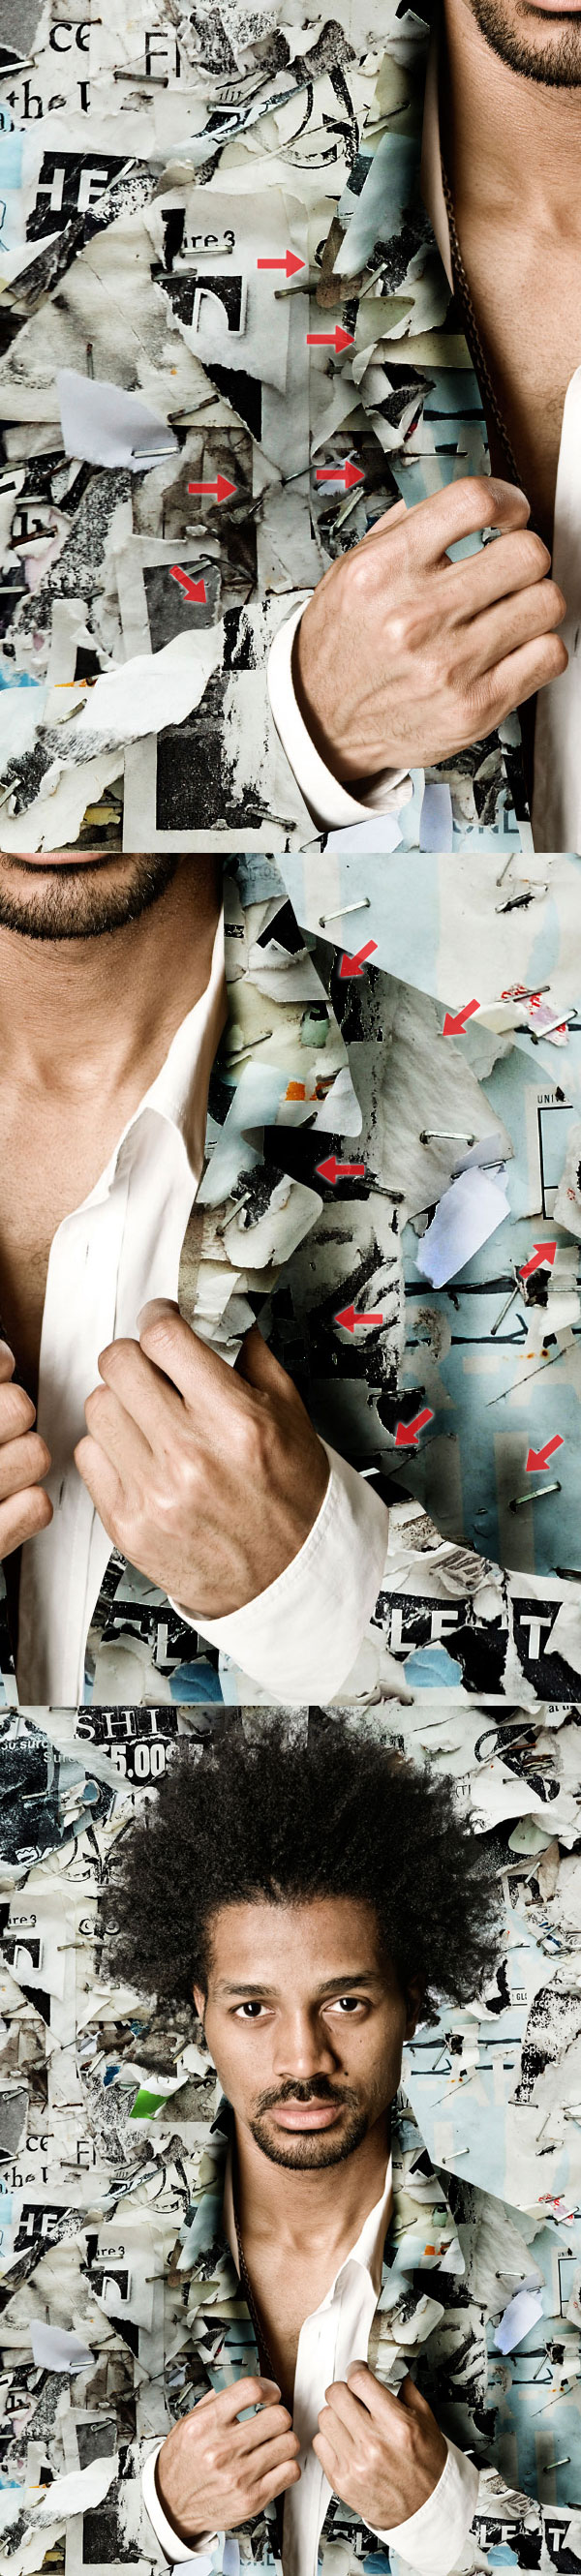
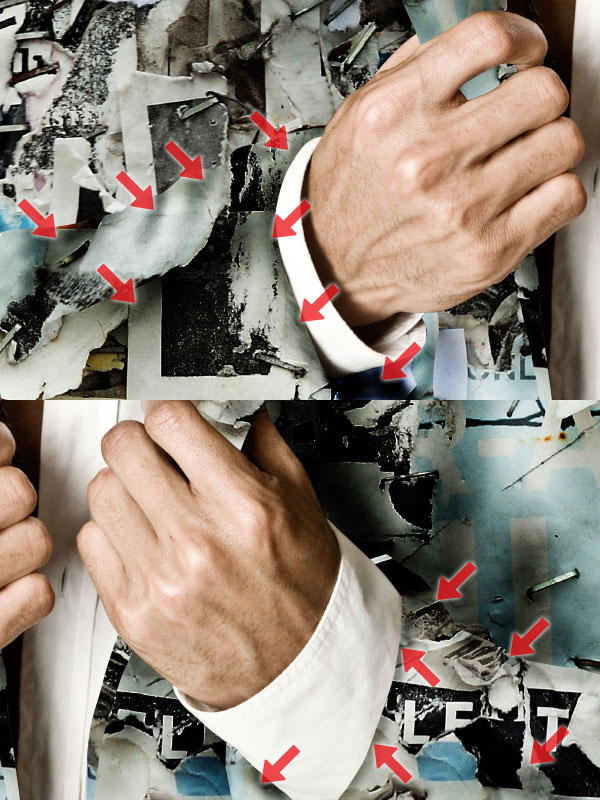
Repeat this process for the remaining areas around the model in order to completely isolate the figure. In the image below you will see another selection I have made using the Pen Tool (P):
After making the selection active I simply painted in the area with a black round brush. In both of the screenshots you will notice the layer mask thumbnail icon is selected (indicated by the small frame that we saw in the previous step).
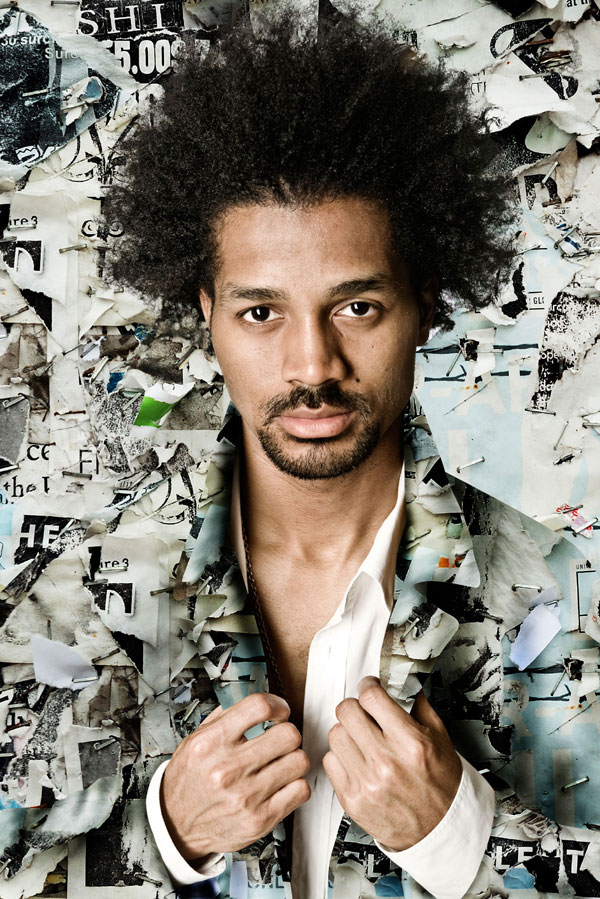
After masking out all of the background areas including he hair that we don’t want, you should have something like the image above. Take your time to make this selection in the beginning of the design, as it will only add to the professionalism in your work.
Step 4
Create a new layer and fill it with a solid black using your Paint Bucket Tool (G). Place this layer between the original layer and the layer with the isolated model.
Next, with your top layer selected, click on the icon at the bottom of your Layers Palette that looks like a small black and white cookie – this is the Adjustment Layer icon that will allow us to apply certain adjustments in a non-destructive way so that we can maintain the quality of our image.
From the menu that appears, choose “Hue/Saturation” and the dialog box will appear. What we want to do next is simply move the Saturation slider all the way to the left so that everything below this layer is completely desaturated.
Step 5
You will notice that when we apply our Hue/Saturation Adjustment Layer, that a small mask icon appears next to the thumbnail icon in your Layers Palette. This allows us to use the built in mask the same way that we would use a normal mask in that by painting into it, we can remove that effect from certain parts of the image.
Switch over to your Brush Tool (B) and choose a small, hard round brush. With a solid black color selected, begin to paint the fabric of the shirt so that it will reveal the original color of the layer beneath the Adjustment Layer. Remember to make sure that you have the Hue/Saturation Layer selected, and that the layer mask thumbnail icon is selected.
Continue to do this, zooming in closely and using a smaller brush for the details until you have revealed all the shirt color.
.
Step 6
Now we are going to save our main document and put this aside for a moment. What we want to do next is open the image of the goggles from the resources folder. Once the image is open, double click the “Background” layer to unlock it so that we can modify it.
Zoom in closely and switch over to your Pen Tool (P) so that you can begin to trace around the shape of the goggles. In certain places the hair may get in the way so try to visualize where the curves would be, we will be fixing this once we drop it into our composition.
Once you are satisfied with your tracing, close the path and hold down the Control Key before clicking anywhere along your path to reveal a dropdown menu. From this menu, choose “Make Selection” just as we did earlier when we were silhouetting our model image.
When the next dialog box appears, simply press the Enter Key or click “OK” to proceed.
You should now see the marching ants that indicate your selection area. While the selection is active, press Command/Ctrl + J in order to paste the selection onto a new layer.
You should now have your original layer, as well as a layer above it containing only the goggles that we have selected.
Step 7
We will now bring the goggles into our Photoshop document and bring this layer to the top of the Layers Palette. The goggles are facing the opposite direction so we will need to quickly do a Free Transform by pressing Command/Ctrl + T and then when the menu appears, choose “Flip Horizontal” as shown below:
Press the Enter Key to accept the changes and position the goggles roughly where we will need them to be. Here I have slightly rotated them and reduced the size just for positioning, which can also be done by initiating a Free Transform Command.
Step 8
Create a new layer at the top of your Layers Palette and with your Pen Tool (P) selected, begin to trace around the goggles. Close the path and click along it while holding the Control Key as we did earlier in order to create a selection. Once your selection is active, switch to your Brush Tool (B). With a light opacity brush setting, begin to paint over the left side of the goggles to cover up the hair.
In order to work faster, you can hold down the Alt/Option Key to toggle back and forth between your brush and the Eye Dropper Tool (I). Doing this will allow you to quickly sample pieces of color and then paint onto a new layer to cover up certain areas of the image, in this case the hair from the model in the original photo.
We will now make an additional new layer where we will trace the lenses of the goggles using the same technique.
Once again, use the Brush Tool (B) after making a selection and paint over the lenses to smooth them out. We will be adding our own highlights and reflections so we want to start with a nice dark lens as a base while still making it look natural.
Continue working on some of the details such as the nose. Here I have made a selection so that I can actually fill in some extra material near the nose. Each time that you cover over a new part of the image you should be creating a new layer so that you have more control over the individual elements.
Step 9
Select your top layer, which should be one of the goggle layers. Then, hold the Shift Key and select the bottom-most layer of the goggles.
You should now have all of your goggle layers selected and highlighted in your Layers Palette. What we want to do now is simply drag these layers below the Hue/Saturation Adjustment Layer so that the goggles also become desaturated.
With all of the layers still selected, press Command/Ctrl + G to put these layers into a Group Folder and name it “Goggles” or something to that affect. From here, we will add a Layer Mask to the Group Folder, which will allow us to mask out parts of the goggle strap near the ear by using a small hard round brush at a low opacity.
With a very light black brush I have also masked out some of the lenses so you can just barely see the eyes underneath.
Check your image from time to time, zooming in and out to see how things are looking. At the moment we have several layers but things are pretty organized and you can see how the image is starting to take shape.
Step 10
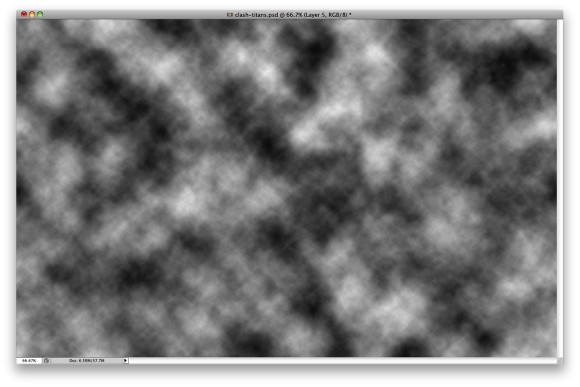
Next we will bring in the grunge texture image from the resources folder and once it’s in your Photoshop document, move it just above the solid black background layer.
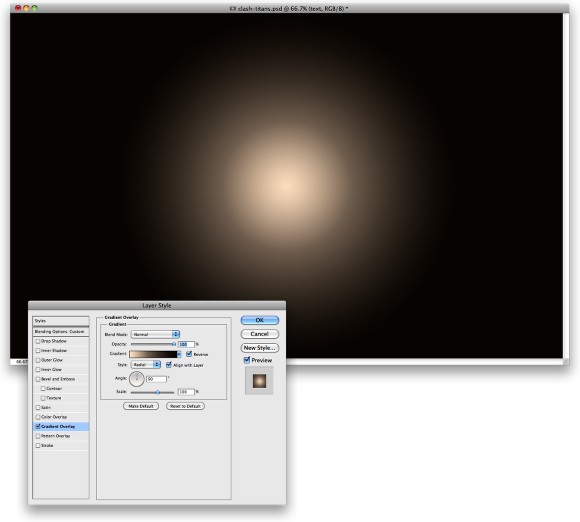
Switch to your Gradient Tool (G) and select a Radial Gradient that fades from black to transparent, also make sure to check off the “Reverse” option as shown below”
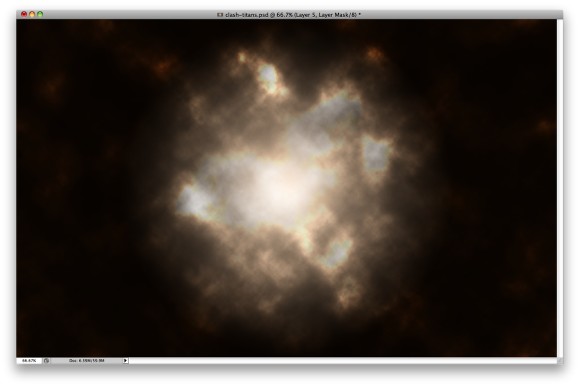
With your texture layer selected, click on the Layer Mask icon at the bottom of your palette to apply a mask to the texture layer. Then, with your Gradient Tool (G), click and drag outwards from the center of the image and you will notice that the gradient now creates a mask that gradually fades the corners of the image.
The thing to remember about using masks is that you can work without having to undo something by simply switching back and forth between a black and white brush and painting onto a layer that has the mask.
Step 11
Holding the Command Key (Control on Wndows), click on the layer thumbnail icon of the silhouetted model and you will see the marching ants indicating your selection.
Create a new layer at the top of your Layers Palette and while still keeping your selection active, switch to your Brush Tool (B). Select a large, soft brush with a deep brown color (here I am using #463626) and begin to paint the hair of the model.
Next we are going to change the Blending Mode of the layer to Multiply as shown below:
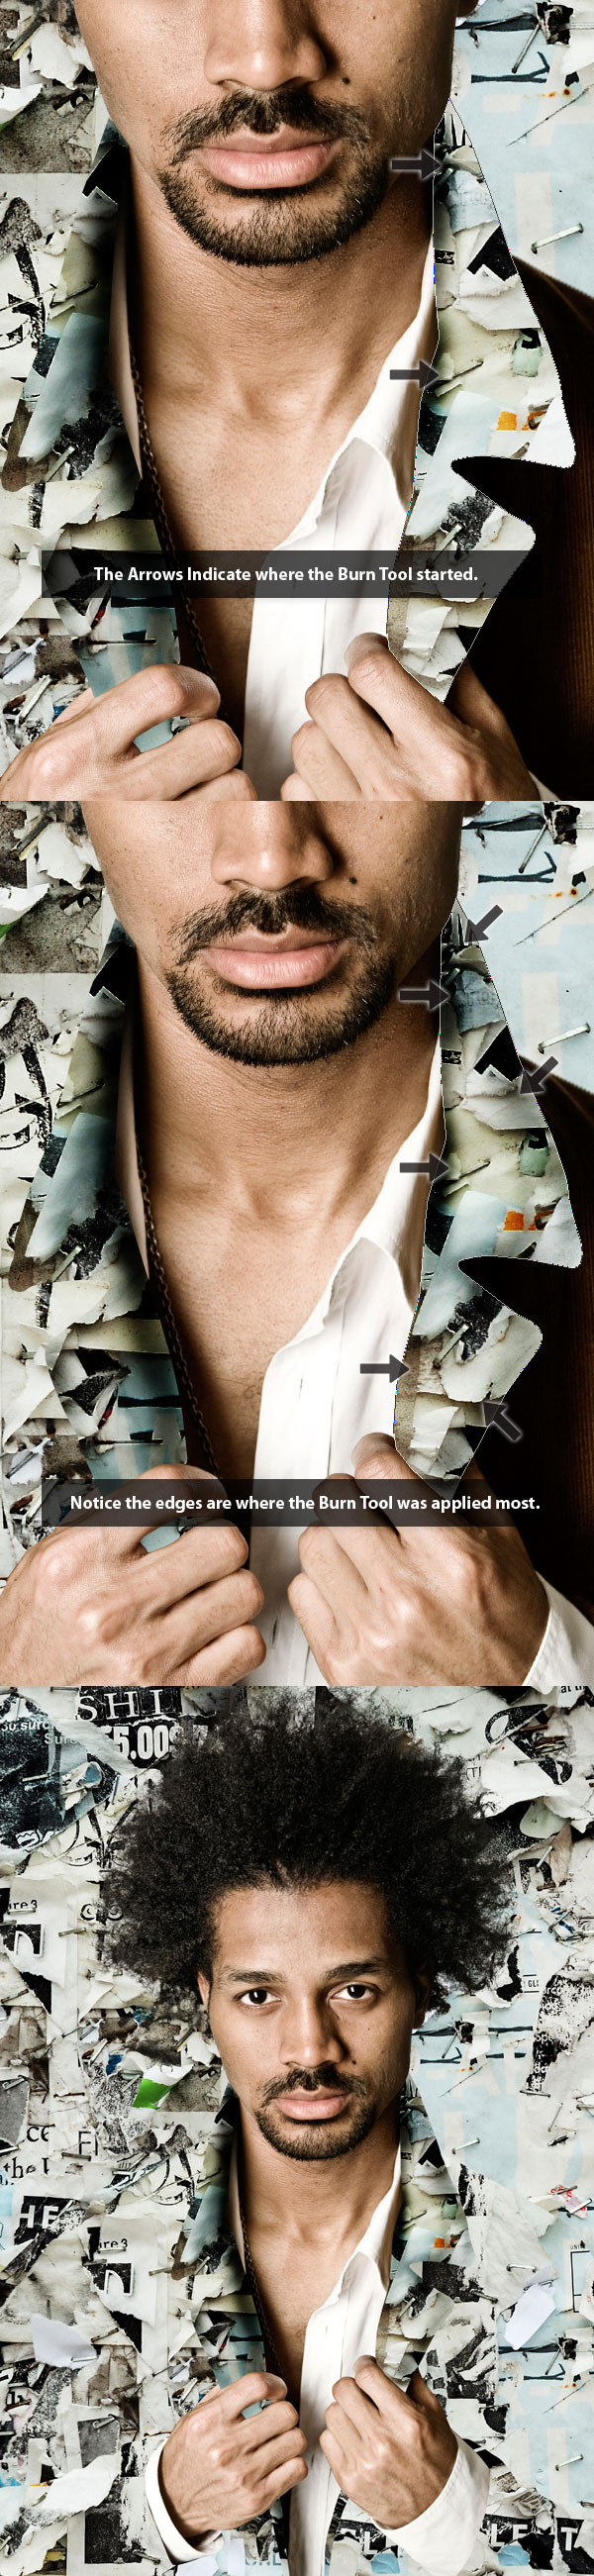
Apply a Layer Mask to this layer and change your color from brown to black and white by pressing the D Key on your keyboard. With your black brush now selected, paint along the edges of the hair and goggles, as well as along the jaw line of the model as I have indicated here:
Take a few minutes to experiment with this until you are happy with the results. We have now given our model some dark brown hair and will continue to manipulate the photo in a way that will allow us to establish the feel that we are going for. Making selections and using masks can be very useful not only for isolating objects from their backgrounds, but also for altering specific pieces of an image resulting in a much more customized feel.
Step 12
Before moving on I am just going to reduce the opacity of the grunge texture to about 60% to provide more contrast between the foreground and the background. Once you have done that, create a new layer at the top of your palette and switch to your Marquee Selection Tool (M). Create a narrow but tall rectangular selection as shown here:
Then, switch to your Gradient Tool (G) and select a Linear Gradient that fades from solid white to transparent, using the settings I’ve shown below:
With your selection still active, click and drag from left to right to create a subtle white fade.
You can now press Command/Ctrl + D to deselect the area and use the Free Transform (Command/Ctrl + T) to rotate and place your gradient over one of the lenses. Press Command/Ctrl + J) to duplicate the layer a few more times so that you have a few of them going over the lenses.
You should now have a few of these layers stacked on top of each other, so we are going to quickly merge them by selecting the top layer and pressing Command/Ctrl + E to merge down until all of your gradients are on one layer.
Next, with your newly merged layer highlighted in your Layers Palette, hold down the Command/Ctrl Key and click on the layer thumbnail icon of the lenses, which are currently inside of the “Goggles” folder. Doing this should activate a selection just around the lenses that we traced earlier on.
With the selection now active, and your top gradient layer highlighted, click on the Layer Mask icon at the bottom of the Layers Palette.
You should now see that your gradient highlights are only showing inside of the lenses. We can now use a light opacity black brush to tone them down as we have gained more control over the highlights by using a Layer Mask.
Step 13
Switch to your Brush Tool (B) and apply the settings shown below:
You should make sure to use a solid black color and then hold the Commad/Ctrl Key and click the layer thumbnail icon of the goggles. Doing this will activate a selection around the goggles. From here, create a new layer just above the goggles and paint just outside of the selection area with your brush. You should notice that this creates an airbrushed effect that will allow us to darken certain parts of the goggles.
Pay special attention to the areas I have indicated in the image above. Shading in these parts will add depth to the image and help bring these separate elements together.
Step 14
Switch to your Paint Bucket Tool (G) and choose a vibrant cyan color (#00B9FF) as shown below:
Create a new layer above the Hue/Saturation Adjustment Layer and fill it with this color.
Next, hold the Command/Ctrl Key and click on the thumbnail layer icon of the model layer. Once the selection around the model is active, hold both the Command/Ctrl + Shift Keys and click on the thumbnail layer icon of the goggles. This will add to the previous selection, so now you should see the marching ants around the model and the goggles together.
With your blue layer highlighted, and your selection still active, press Command/Ctrl + Shift + I on your keyboard to inverse the selection.
After inversing your selection, once again click on the Layer Mask icon at the bottom of the Layers Palette to mask out the color everywhere except for the background.
Change the Blending Mode of this layer to “Color” and you should end up with a result similar to the image shown below:
Step 15
Create a new layer at the top of the Layers Palette and switch back to your Brush Tool (B) and apply the following settings with a solid black fill:
Using this large soft brush, paint around the edges of the image to further fade the corners to black. The idea here is to help push the background further back and to bring the model to the foreground to add more contrast to the design.
Step 16
What we are going to next is move the model and all of the corresponding parts towards the center of the image in order to make room for a jetpack. To do this, we will first need to select the top most layer (excluding the vignette layer as this can stay in place) then, hold down the Shift Key and select the bottom model layer. This should select all of the layers shown below:
Hold down the Shift Key once again and tap all of the layers to the left about 8-10 times so that all of them shift over together.
You will notice now that the blue background doesn’t extend all the way, and we have already applied our mask, which we don’t want to mess up. Luckily, there is a quick way to adjust this so that we can maintain our mask and also have the color extend all the way to the edge.
Notice in the image above that there is a small link icon between the thumbnail icon and the layer mask icon. What we want to do here is hold down the Alt/Option key and click on this small link icon to “unlink” the two temporarily.
Now all we need to do is press Command/Ctrl + T to initiate a Free Transform, and simply drag the handle on the right side all the way to the edge of the canvas. Once again, hold down the Alt/Option Key and click between the two thumbnail icons to “re-link” the color with the mask. That is a quick way to adjust the image without it messing up our Layer Mask.
Step 17
Create a new layer just below the vignette layer and with your Pen Tool (P) selected, begin to create a tubular, jetpack shape something like the image below:
After closing your path, hold down the Control Key and click anywhere along this line just like we did earlier and proceed to activate the selection. Once this happens, switch to your Brush (B) and fill in the area using a dark brown color – here I am using #3C2C17.
The idea is to quickly establish something that we can work with for the beginning of her jetpack.
Step 18
At the moment our shape is overlapping the arm of our model, and we want it to fall behind her as if it’s placed on her back. We can fix this by holding down the Command Key (Control on Windows), clicking the thumbnail layer icon of the model to activate a selection. We will then inverse the selection by pressing Command/Ctrl + Shift+ I.
Once we have our active, inversed selection, we will simply need to apply a Layer Mask by clicking the icon located at the bottom of the Layers Palette.
Next, hold down the Command/Ctrl Key and click on the thumbnail layer icon of the jetpack shape to create a selection. We can now use a mid-sized brush to fill in some quick highlights.
With your selection still active, create a new layer above the jetpack layer and set the Blending Mode to Screen. We will then select a brighter shade of color – here I am using #B5721B.
Start to fill in some of the lighter shades of color in your new layer by using your brush. Keep the opacity setting around 20% so that you can build up the color gradually. We don’t need to focus on the details too much at this point but we want to start introducing some more values to the color scheme.
Create another new layer and change the Blending Mode to Multiply. Using your low opacity brush, choose a dark brown color (#32220E) as shown below:
Just as we added in some highlights we can bring in some shadows and begin to paint into the shape using the same technique.
Step 19
Select your jetpack shape layer, and then while holding the Shift Key, click on the shadow layer so that you have all three of your jetpack layers selected.
Press Command/Ctrl + G to put all three of these layers into a Group Folder and name it something clever like “Jetpack” or anything else that you would like.
What we are going to do now is just quickly select our new folder and press Command/Ctrl + T so that we can use the Free Transform Command to make our entire shape wider. We want the jetpack to be thicker or around the same thickness as the arm of the model.
Once you are happy with the sizing and positioning, press the Enter Key to apply your changes. We will then hold down the Command/Ctrl Key and click on the thumbnail layer icon of the model to activate a selection around her. Then, we will once again inverse the selection Command/Ctrl + Shift + I.
The last step is to now click on the Layer Mask icon so that all of the jetpack shapes and shadows are behind the model (or so it appears, such is the wondrous glory of Photoshop).
Hopefully you are starting to see the patterns and getting the hang of using the tools to make selections and mask them as you see fit.
Step 20
Next, hold the Command/Ctrl Key and click on the thumbnail layer icon of the jetpack base layer as shown below:
Once you have activated your selection we are going to create a new layer above the jetpack folder. Switch to your Brush Tool (B) and bring up the brushes options panel by pressing F5 on the keyboard. Click the small arrow on the upper right of the panel to load the grunge brushes from the resource folder.
After loading the brushes, select the first of the four brushes in the set.
With the panel still open, we are going to check off “Shape Dynamics” and apply the settings shown here:
We will also need to check off “Scattering” and apply these settings:
After you have applied these settings we will also want to check off the “Smoothing” option. Move your new layer inside of the jetpack folder and change the Blending Mode to Soft Light. Using a light brown color, begin to paint with your modified grunge brush onto this layer.
You will see I have created a second layer above this one where I have used a darker brown color on a layer set to Multiply in order to establish some darker grunge texture on the jetpack.
Step 21
Create a new layer on top of the jetpack folder and using your Marquee Tool (M) we are going to hold down the Shift Key and drag outwards to create a circular shape. We will fill this shape with a medium gray color as shown below:
Press Command/Ctrl + T to initiate a Free Transform and then hold down the Control Key and click on the shape to reveal a dropdown menu. From the menu, select “Skew” and drag the upper left handle downwards, similar to the image shown here:
You should also use the Free Transform Command to reduce the width of the shape by moving in the right handle so that it appears to be in perspective. Create a duplicate of this layer by pressing Command/Ctrl + J and fill the original layer underneath with a solid brown color (you can sample a brown from the jetpack base by holding down the Alt/Option Key to toggle between the Eyedropper and the Brush Tool).
Create a few more shapes below these layers to create more depth. Here I have created a rounded back, and a stem looking piece connecting the shapes to the base of the jetpack. The easiest way to do this is to continue using the Pen Tool (P) and then making a selection that you can fill with a color sampled from the jetpack.
Step 22
What we want to do now is add a bit more detail to these pieces and having each piece on it’s own layer will make this a great deal easier. Hold the Command/Ctrl Key and click on the layer thumbnail icon of the individual piece to create a selection. From here, you can then create a new layer above it and paint into it using a low opacity brush.
We want to work fairly quickly to establish some details such as some hands on the face of the gauge of the jetpack. The smaller details are created separately using the Pen and Brush Tools. Once you have established some detail you can select the top layer of your details, hold down the Shift Key, and select the bottom layer so that they are all selected together as shown below:
Press Command/Ctrl + G to place all of these layers into their own Group Folder. Here I have named the folder “Jetpack Clock” just so I can identify it quickly once the layers start adding up.
In order to make the folder appear to be placed behind the model we will need to hold down the Command/Ctrl Key and click on the layer thumbnail icon of the model and inverse the selection (Command/Ctrl + Shift + I).
With the selection now inversed we can click on the Layer Mask icon at the bottom of the Layers Palette.
Step 23
Next, create another new layer above the “Jetpack – Clock” folder and with your Pen Tool (P) selected, trace a curved shape around the middle part of the jetpack. Close the path and activate the selection.
While your selection is active, select a medium brown color such as #523612 as shown below:
We can now use either our Brush Tool (B) or the Paint Bucket (G) to fill the selection with our color.
We will need to add a lip so that the shape doesn’t just end at the edges. To do this, zoom in and with a small hard round brush, paint some small curved shapes using the image below as a guide:
Once you are happy with the shape, hold the Command/Ctrl Key and once again click on the layer thumbnail icon of the model layer to activate the selection.
Now we will simply erase the shape from this selection so the model is in front.
Step 24
Switch back to your Brush Tool (B) and select a light tan color – here I am using #E0CA9E.
Hold the Command/Ctrl Key and click on the layer thumbnail icon of our new shape. Once you have activated your selection, create a new layer just above the shape and using a soft round brush with a low opacity, begin to brush along the top edges of the shape to add some highlights. You can also experiment with the Blending Modes here, but I find that using Overlay works quite well for this part.
Continue to paint on new layers in order to add some more texture and detail to this piece of the jetpack using the same techniques.
Once you have added some more value, select all of these layers by clicking the top layer, holding the Shift Key, and clicking the bottom layer.
We can now put these layers into their own folder by again pressing Command/Ctrl + G as we have done earlier on with the other main pieces.

Step 25
Create another new layer and using your Marquee Selection Tool (M), create a small circular shape and fill it with white.
Press Command/Ctrl + J to duplicate the layer and then move it downwards while holding the Shift Key to make sure that it falls directly below the top shape.
Now we will add a third layer and this time draw a rectangular shape filled with white in order to connect the two circles together.
Select these three layers and press Command/Ctrl + E to merge them together. We will now duplicate this layer two more times by once again pressing Command/Ctrl + J. You should now have three of these shapes in total. Place each shape so that they appear to follow along the shape of the jetpack and check to make sure that they are an equal distance apart.
After placing the three shapes, hold down the Command/Ctrl Key and click on the first layer thumbnail icon of the top shape. After activating the selection, hold down the Shift and Command/Ctrl Keys to click on the layer thumbnails of the remaining two shapes. You should now have an active selection around all three of these new shapes.
With the selection still active, click on the “Jetpack – Detail” folder that contains the middle shape, and inverse the selection by pressing Command/Ctrl + Shift + I. Notice that there are now marching ants around the shapes and also the outer boundaries of our canvas.
Next, click on the Layer Mask icon and turn off the visibility of the three shape layers. You should be left with something like the image shown below:
Step 26
Create a layer below the “Jetpack – Detail” folder and using a low opacity brush, paint in some shadows where the shapes are knocked out to create some depth.
Continue to use this technique by holding the Command/Ctrl Key and clicking the layer thumbnail icon of the various shapes to activate selections before painting into them using a brush with various opacity settings. Feel free to also experiment with the Blending Modes of these layers to see which ones yield the best results.
You can see in the image above that I have added several layers to my design that contain either shadows, highlights, or textures that will all help the jetpack and the overall image feel more cohesive.
The techniques we have been using so far should be somewhat familiar to you by now, so continue working in this way to build up your image by adding more details as you go. I have added a tube to the back of the jetpack as well, and did this by creating the shape with the Pen Tool (P) before activating the selection and painting into it. The highlights were then added by clicking the layer thumbnail icon of the base shape, creating a new layer above it, and painting outside of the edges with a low opacity brush.
After spending a bit more time adding some details and color to the jetpack you will start to see how it can really come to life and feel like it is a part of the image and in addition, it also helps add to the steampunk feel that we are going for.
Step 27
Create a new layer at the top of the Layers Palette, just beneath the vignette layer. With your Pen Tool (P) begin to trace a shape for where the strap would fall over the shoulder. Using the same techniques we have been using throughout, close the path, make your selection, and fill it in with some darker colors as shown below:
At this point we can go ahead and finish the bottom piece of the strap that would come below and in front of the model. We will again just hold down the Alt/Option Key to toggle between the Brush Tool (B) and the Eyedropper Tool (I) so that we can quickly sample some colors from the darker areas of the jetpack.
Once you have completed the lower part of the strap, make a copy of the layer (Command/Ctrl + J) and move it below the original. Hold down the Command/Ctrl Key and click on the layer thumbnail icon for this layer to activate a selection around it. After you have done that, fill the duplicate shape layer with solid black.
With this layer still selected, we are going to go to the Filter menu and select Blur>Gaussian Blur.
When the menu appears we want to apply a blur setting of about 3.2 pixels.
After applying the Gaussian Blur all we need to do is zoom in and clean up the edges a bit where the shadow overlaps the arm.
Step 28
Now that we have the jetpack and the straps created we are going to add some more details. Create another new layer above the straps and switch to your Brush Tool (B). Use a small hard round brush with the settings shown here:
Switch over to your Pen Tool (P) and begin to follow the curve of the straps, leaving a bit of space between your path and the bottom edge of the material.
Once you have created a path that you are happy with, hold down the Control Key and click anywhere along the path to reveal the dropdown menu. From this menu, we want to select “Stroke Path” as shown here:
When the next box appears, make sure to leave “Simulate Pressure” unchecked since we want a uniform stroke applied.
After creating the stroke we will hold the Control Key once more and click along the path to bring up the menu where we will now select “Delete Path” which will leave only the stroke created by the brush.
Repeat this process for the remaining seam on the bottom part of the strap.
Step 29
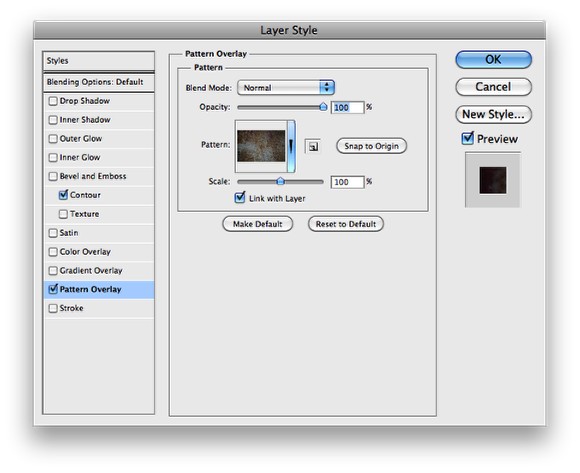
Double click on one of the seam layers that we created in the previous step to bring up the Layer Styles. Once the dialog box appears, check off “Color Overlay” as shown in the image below:
For the color we will use #93701E.
Once applying the settings, press the Enter Key to apply the settings. Next, what we want to do is hold down the Control Key and click on the layer that we have just applied the Color Overlay to and when the dropdown menu appears, select “Copy Layer Style”. Hold down the Control Key again, this time on the other seam layer. When the menu appears this time, choose “Paste Layer Style” to apply the same effect to both of the seam layers.
Step 30
What we want to do next is select both of the seam layers by selecting the first in your Layers Palette, holding down the Shift Key, and then clicking on the second layer. From here, simply press Command/Ctrl + G to put them into a Group Folder. I have also done this for the actual straps of the jetpack.
With the newly created folder containing both of the seam layers, click on the Layer Mask icon at the bottom of the palette to apply a mask.
Use a small hard round brush to mask out small gaps along the seams, giving them a more “sewn” appearance. As you are working, try to keep an equal amount of space between each section of the seam.
Once you are happy with that, increase the size of your brush and set it to a low opacity (10 – 20%) and then paint with black into the image where we want to essentially reduce the visibility of the seams in certain areas to give them some depth. The image below indicates the areas where I have made a few passes with my brush to achieve this.
Step 31
At this point I think we need to make some small tweaks and adjustments to a few areas in order to create some more balance and uniformity throughout the design. First let’s select the copy of the model layer, that is the “Original Copy Overlay” layer and make a copy of it by pressing Command/Ctrl + J. This will enhance the Overlay effect that we have applied to give the skin a bit more contrast. One thing you might try here is adding a Layer Mask and brushing out certain areas of her arm, as the shadow is a bit too heavy and dark.
Next we want to make a change to the shirt. To do this we will use the selection we made earlier by holding down the Command/Ctrl Key and clicking on the layer thumbnail icon of the Hue/Saturation Adjustment Layer that we created earlier on.
Once the selection is active, we will need to inverse it so that we have the shirt selected, rather than everything around it. To do this, press Command/Ctrl + Shift + I and now we have the shirt.
With your selection remaining active, create a new layer above the Adjustment Layer and fill the selection with solid black using either your Brush Tool (B) or Paint Bucket Tool (G). After that, reduce the opacity of the layer to somewhere around 30-40% and change the Blending Mode to Color.
Step 32
We now want to bring back in some of the flesh tones and the color of the skin, so we can reduce the opacity of the Hue/Saturation Adjustment Layer down by about 10 – 20% just to show a bit of variation in the skin. Even some of these darker purple colors will add life back into the figure.
Step 33
Jumping around a bit more we will now create a new layer and using a large soft round brush at a low opacity, brush in some highlights on top of the goggles. You can see my settings below, but feel free to experiment here and see where you would like the highlights to fall.
Step 34
Create another new layer above the hair color and change the Blending Mode to Overlay. Using the same brush, begin to paint in some highlights over the hair to bring out some of the brighter areas. Continue to make new layers and use your brush at various opacity settings in order to mix things up.
Here I have created another new layer set to Overlay, and instead of a white color for the brush, I am using #5C3C15 and painting over the hair as doing this will make the hair look more reddish and vibrant. Experiment with the opacity of the layer and see what you like.
Step 35
The next adjustment that we need to make is on the jetpack, and what we want to do here is tone down some of the vibrancy and saturation a bit to help it blend with it’s surrounding elements.
To do this, you will need to go through the different parts of the jetpack layers and hold the Command + Shift Keys while clicking on the layer thumbnail icons of the different shapes. You don’t need to get all of the highlights here, only the main pieces like the clock, the straps, the tube, and the jetpack base shapes need to be selected.
Once these are all selected we will have the whole jetpack. From here, click on the Adjustment Layer icon at the bottom of the Layers Palette and select “Hue/Saturation” from the menu.
You will notice that now, because we had all of these pieces selected, it will automatically apply the mask when we select the Adjustment Layer of our choosing.
In this case we will be desaturating and slightly darkening the object, you can see the settings I am using for the jetpack below:
Step 36
Just to add a few more details I have painted in some darker shadows below the model and jetpack layers and have also added a Curves Adjustment Layer by clicking the icon shown below and choosing “Curves” from the menu.
Below are the settings that I am using in the image, feel free to experiment with this but remember that it should be subtle.
Step 37
Another detail that I have added to the background is some cool steampunk machine drawings, which I have downloaded from DeviantArt. For your convenience, these brushes have been saved in the resources folder and can easily be loaded into Photoshop.
In the image below, I have used a white brush at full opacity on a new layer set to Overlay, and then applied a Layer Mask so that it appears behind the model and the jetpack. Lastly, reduce the opacity of the layer so that some of the grunge texture shows through.
Step 38
At this point we are just adding bits of detail throughout the image to push it a bit further. Here I have created a new layer set to Overlay and just used the Pen Tool (P) to create a few paths that follow the details of the jetpack and stroked it with a white brush.
These extra pieces of detail go a long way when looking at the overall image.
Step 39
We will add one more layer just below the Curves Adjustment Layer and fill it with a solid black using your Paint Bucket Tool (G). From here, go to the Filter Menu and choose Noise>Add Noise as shown below:
The image below shows the noise settings that I am using.
Change the Blending Mode of the noise layer to Soft Light and reduce the opacity to somewhere around 8-10% as shown.
Step 40
We are now finished with our Steampunk inspired design! I know that there were a lot of steps to follow but I hope that I was able to give you some useful tips and information along the way. If you have made it this far then you have done a great job and you should now have a few new techniques that you can try out and apply to some of your own designs. Thanks for watching!
And We’re Done!
You can view the final outcome below. I hope that you enjoyed this tutorial and would love to hear your feedback on the techniques and outcome.


 Step 6: Now to bring in the sky. Open up the sky image and select the


