Showing posts with label Adobe Photoshop Tutorials. Show all posts

Thursday, August 16, 2012

Photoshop Essentials: Understanding Drop Shadows


Post Pic

Adobe Photoshop includes Layer Styles, a number of automated effects that you can apply to layers, including drop shadows, glows, beveling, and embossing, as well as a color fill effect. Layer styles allow you to edit applied effects dynamically without having to create a smart object version of the image layer first.
Adobe Photoshop includes Layer Styles, a number of automated effects that you can
apply to layers, including drop shadows, glows, beveling, and embossing, as well as a color fill effect.
Layer styles allow you to edit applied effects dynamically without having to create a smart object version of the image layer first. This means that you can apply editable effects to a selected image, shape, or type layer without permanently altering any pixels.
Each layer style contains its own settings; however, many of the controls are available for more than one effect and they operate in the same way. The best way to become familiar with them is to experiment. Apply a Layer style, play around with the control settings, and use the Preview option to decide whether you like what you see. You’ll notice as you experiment that many of the controls are self-explanatory and the dialog is very intuitive.
Applying effects to layers is easy. Either double-click on a layer to open the Layer Style dialog, or go to menu Layer>Layer Style. Alternatively, you can click Add Layer Style button at the bottom of the Layers palette (the one with the fx icon), and choose an effect from the list.
Working with Layer Styles - understanding Drop Shadows in Photoshop CS3
Some things to take note of when working with layer style effects and the Layer Style dialog:
Layer styles cannot be applied to the Background layer.
Layer styles can be applied to only a single selected layer at a time—not to multiple selected layers or to layer groups.
Layer styles are attached to the layer. Therefore, when you move the layer in the Layers palette, the effects tag along.
- Type layers remain editable even after a layer style effect is applied.
Layer styles can be copied from one layer to another.
- Adobe Photoshop displays applied Layer style effects as items in the Layers palette.
- Clicking the eye icon next to each effect’s name in the Layers palette temporarily disables the layer style. Click the eye next to the word Effects to temporarily disable all the applied layer styles for that layer.
- Lowering the Fill percentage in the Layers palette reduces the Opacity of the layer, but not the appliedLayer styles.
The Global Light option in the Layer Style dialog box tells Adobe Photoshop to apply the same angle to all direction-dependent effects, such as Drop ShadowInner Shadow, and Bevel And Emboss. The idea here is to simulate consistent real-world lighting.
- Combinations of layer style effects can be saved for later use in the Styles palette.
Take a close look at how Drop Shadows work:
Drop Shadow applies a basic drop shadow—not a perspective drop shadow—to the images, type, or shapes that are contained within the layer. Adobe Photoshop allows you to specify the color, opacity, blend mode, position, size, and contour of the effect.
Applying effects to layers is easy. Either double-click on a layer to open the Layer Style dialog, or go to menu Layer>Layer Style.
Working with Layer Styles - understanding Drop Shadows in Photoshop CS3
Alternatively, you can click Add Layer Style button at the bottom of the Layers palette (the one with thefx icon), and choose an effect from the list.
Working with Layer Styles - understanding Drop Shadows in Photoshop CS3
Once the Layer Style window opens, pick the Drop Shadow, apply settings and click OK.
Working with Layer Styles - understanding Drop Shadows in Photoshop CS3
The top part of the Drop Shadow settings allow you to set a blending mode for the effect as well as the colour of the shadow. Just double-click the black rectangle to bring up the Color Picker. You can also move the slider to alter the opacity of the shadow.
Working with Layer Styles - understanding Drop Shadows in Photoshop CS3
Use the Angle circle to set the angle of the light source. Whatever angle you choose will be in relation to the original layer shapes. If you keep the Use Global Light option checked, the effect will use the current angle setting from Layer>Layer Style>Global Light.
Working with Layer Styles - understanding Drop Shadows in Photoshop CS3
At the risk of sounding obvious, use the Distance slider to set the distance (in pixels) of the drop shadow in relation to the original layer shape. The Spread option allows you to control where the shadow starts to fade, while the Size slider controls the size of the shadow, again in pixels.
Working with Layer Styles - understanding Drop Shadows in Photoshop CS3
The Quality area of the dialog allows you to set different contours. These beauties control the edge shape of the shadow and can dramatically alter the effect. Keep the Anti-aliased box checked to soften the edges between the shadow and other parts of the image, and also experiment with the Noise slider.
Working with Layer Styles - understanding Drop Shadows in Photoshop CS3
When working with Drop Shadows, it’s worth keeping the Layer Knocks Out Drop Shadow option checked. This will prevent the shadow from showing through layer pixels that have a low Fill opacity
Tip: To use the same Drop Shadow settings on another layer, drag the Drop Shadow layer in theLayers palette to the other layer. When you release the mouse button, the shadow attributes are applied.
Working with Layer Styles - understanding Drop Shadows in Photoshop CS3
No related posts.
Photoshop Essentials: Retouch and Healing Tools


Photoshop offers a large selection of tools and features for retouching photographs and images. In this tutorial, you’ll learn how to use the common touch-up tools.

Spot Healing Brush Tool

The Spot Healing Brush is primarily used to quickly remove blemishes, imperfections or other unwanted elements from an image. To use it, paint over an imperfection you’d like to get rid of using a suitable brush (brushes can be selected and modified in the options bar). The Spot Healing Brush Tool will automatically try to repair the imperfection by sampling the surrounding area.
This diagram illustrates how to use the spot healing brush tool.
Careful! Although the Spot Healing brush can be a great tool for quick fixes, it’s not always guaranteed to work if the area surrounding the imperfection is busy. Generally speaking, the surrounding area should be an approximate match in color & texture to what you want to take place of the unwanted element in your image.

Healing Brush Tool

The Healing Brush Tool performs a similar function to the spot healing brush tool mentioned above. Instead of automatically trying to determine the lighting, shading, and texture from the surrounding area, the healing brush tool lets you manually select a source, and then paint over an imperfection. To select a source, hold alt and click the desired part of the image. Then paint over the area you wish to replace. As with the Spot Healing Brush Tool, settings such as brush size can be controlled in the options bar.
To heal an area, select a source, and then paint over that area.

Patch Tool

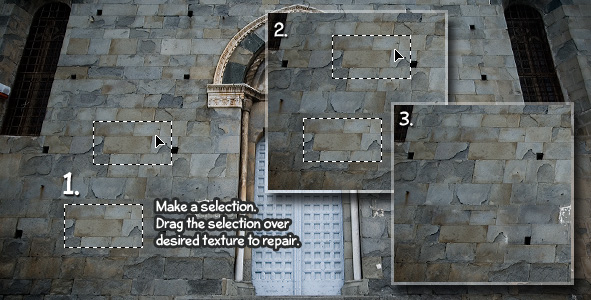
With the Patch Tool, an entire area can be repaired with pixels from another area. Just like the healing brush tool, the patch tool will try to correct lighting, shading, and texture. To use the patch tool, first draw a selection with any of the selection tools (or the patch tool, which will function as a lasso tool). Then, using the patch tooldrag that selection over the destination you want to use to repair that area.
How to use the Patch Tool in Photoshop.

Clone Stamp Tool

The final tool we’ll cover in this tutorial is called the Clone Stamp Tool. The Clone stamp tool allows you to paint with a sample of an image.
Select a source area to use for painting by holding Alt and clicking.  Then paint as you would with any other brush.
Keep in mind that you are not healing/repairing an image when you use the Clone Stamp Tool. Therefore, lighting and shading will not be maintained when you paint over an area. What you see is literally what you get when you paint from a given source, making it very useful in certain situations.

Blur & Sharpen Tools

The Blur and Sharpen Tools allow us to manipulate edges by making them softer or harder. They do exactly what you would expect them to do; blur and sharpen.
Both tools have similar attributes such as Strength (increase or decrease the strength of the tool, or how much it will blur) and the brush, all of which can be adjusted in the Options Bar for each tool. To use the blur or sharpen tool, simply set up the brush to your specification, hold down the mouse button, and hover over the areas you’d like to alter in your image.
How to use the Blur and Sharpen Tools in Photoshop
You should have a pretty good feel of the basic retouching tools by now. The next step in mastering Photoshop is usually learning how to use the painting tools to compliment your photo remastering abilities!

Photoshop Essentials: Photoshop Color Replacement Tool


Photoshop Color Replacement Tool
Some tools don’t get enough attention, this tool might be one of them. You could compare it somehow with the Healing Brush, although there is a difference. This tool works like a regular paint brush, it manipulates the color on your image while the underlying texture stays unaffected. Because of this, you can apply a color change in a more precision way.
If you select the tool in the Toolbox, you'll get to see the various options in the Options bar like different Modes to work with in which the Replace Color Tool can be applied: Hue, Saturation, Color and Luminosity. The Hue will apply the replacement in the most subtle way, while the Color mode might result is a far too vibrant effect.
Sampling determines the source for the color replacement. "Continuous" means you will be continuously sampling as you go. "Background Swatch" uses the background swatch as a pre-defined sample color. Only areas containing the current background color will be replaced. "Once" will replace the targeted color only in areas containing the color that you've first clicked.
You also have Limits options. "Contiguous" will replace colors that are contiguous with the color immediately under the pointer "Discontinuous" will replace the sample color under the pointer wherever you go. "Find Edges" will replace connected areas containing the sampled color while preserving the sharpness of the shape edges.
The Tolerance is a bit like with other tools, the higher the percentage the broader the range and the more colors will be replaced. Check the antialiasing option to get softer edges, although it could give you a less precise result. You can use the "Find Edges" options to limit the antialiasing.
The foreground color will be used as your new color that will replace the unwanted color.

BEFORE AND AFTER

Compare both 'before' and 'after' effect

THIS IS WHAT I DID:

  • choose the "Once" option for the more dangerous areas and the "Continuous" for the safer areas
  • used the "Hue" mode for a more subtle replacement (the others will create pretty drastic results)
  • used the "Color" mode in combination with a less vibrant color to enhance the pink color of the shirt
  • used the "Background Swatch" sampling option to resolve the grey areas
Experimenting with different modes and colors - Fixing the grey areas using the Sampling Background Swatch

Monday, July 2, 2012

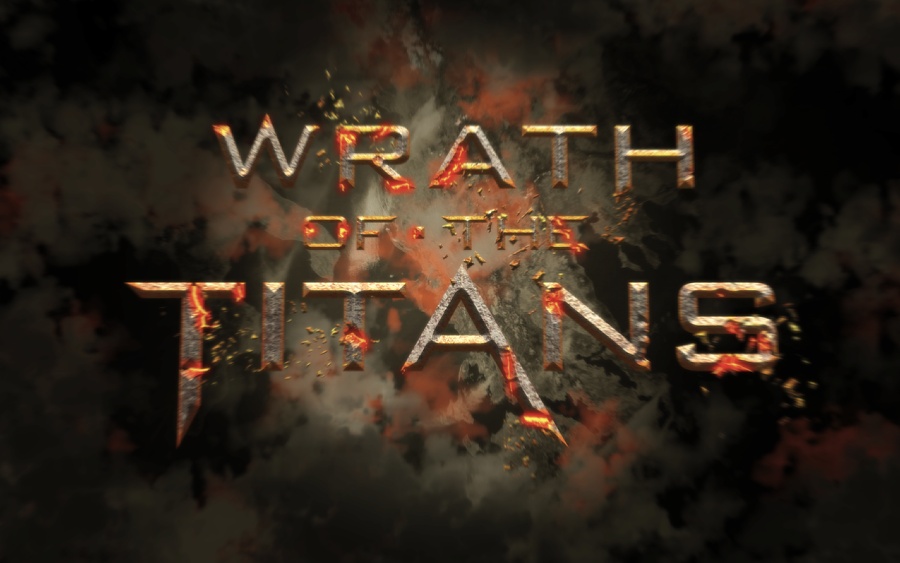
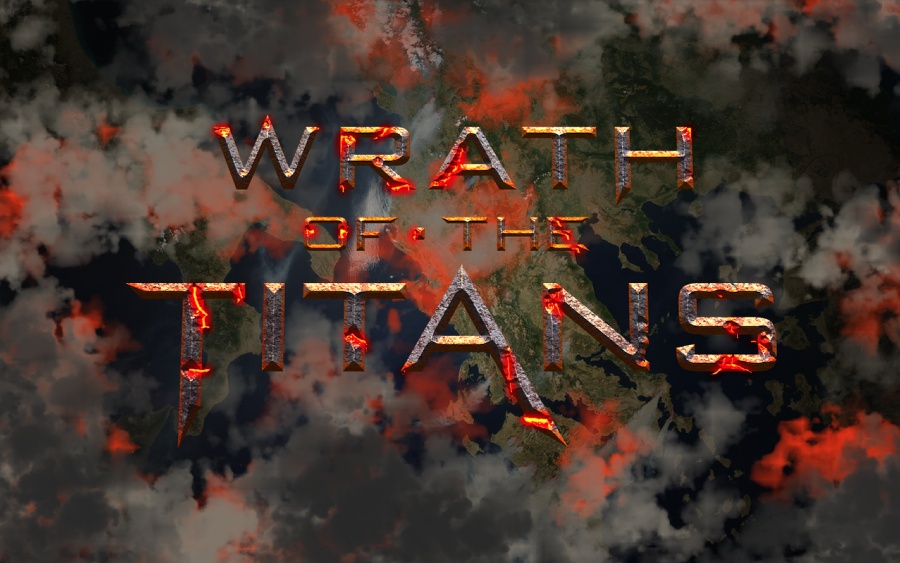
Movie Poster 2: in Photoshop CS6

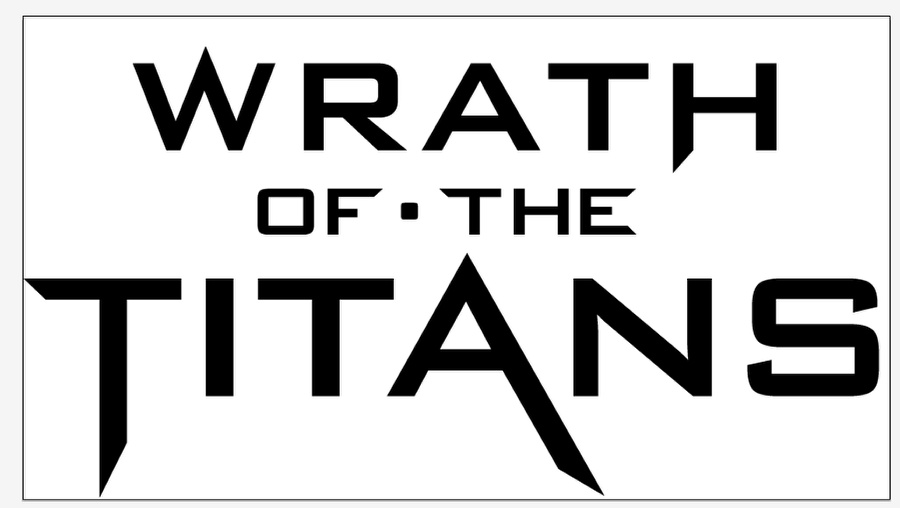
Step 1 First thing to do is to get the text right. To do that is pretty easy, we have already showed a tutorial on how to make the Clash of the Titans logo, so you can just follow that at http://webtutorextreme.blogspot.in/2012/07/movie-poster-1-text-effect-in-photoshop.html
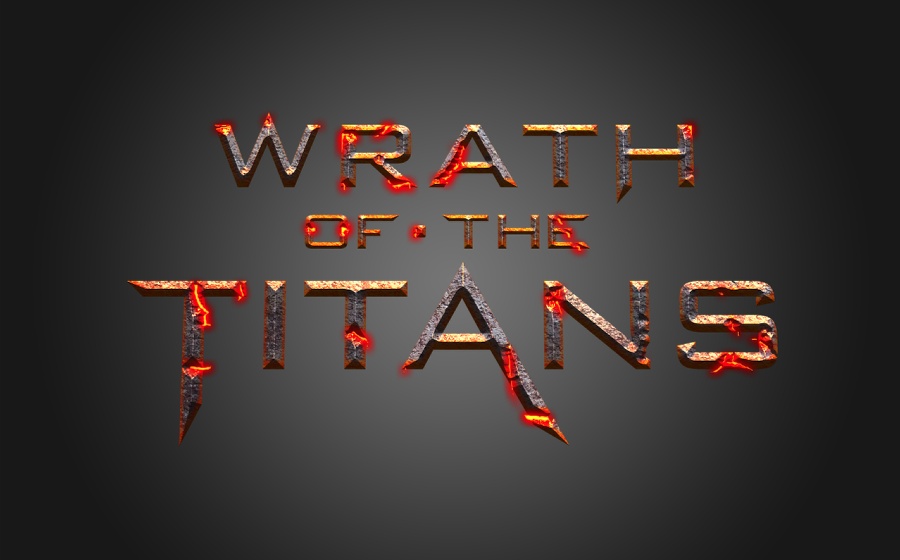
Wrath of the Titans in Photoshop CS6

Step 2

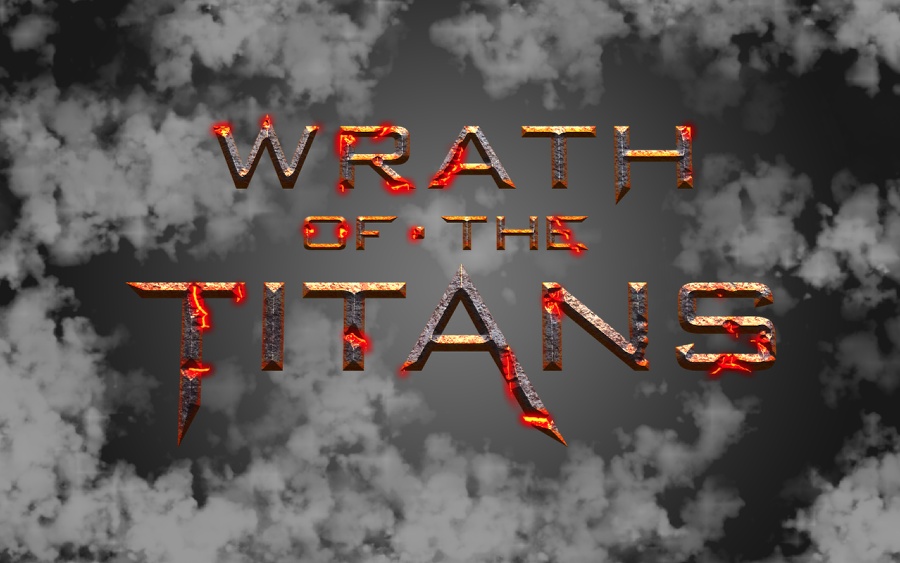
Now in Photoshop, create a new document and fill the background layer with a radial gradient from #181818 (dark) to #757575 (light).
Wrath of the Titans in Photoshop CS6

Step 3

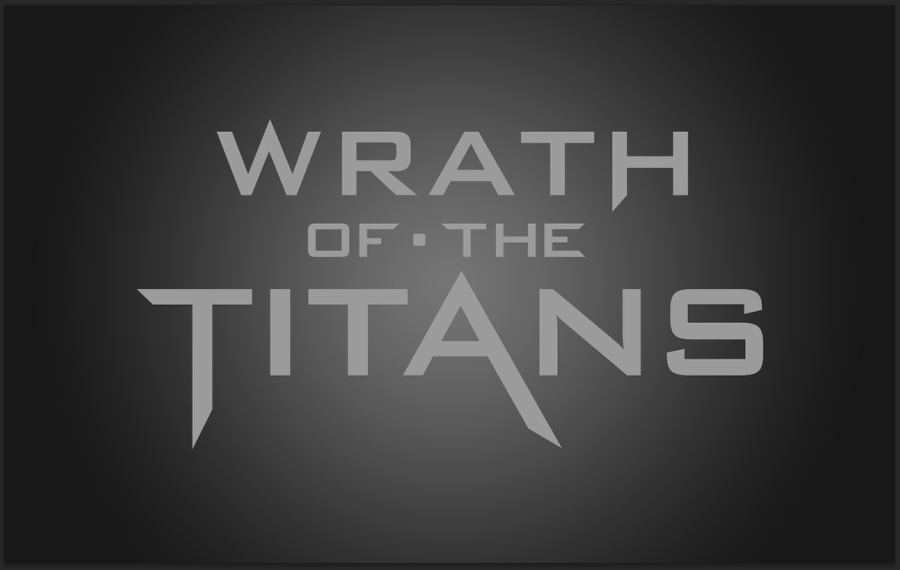
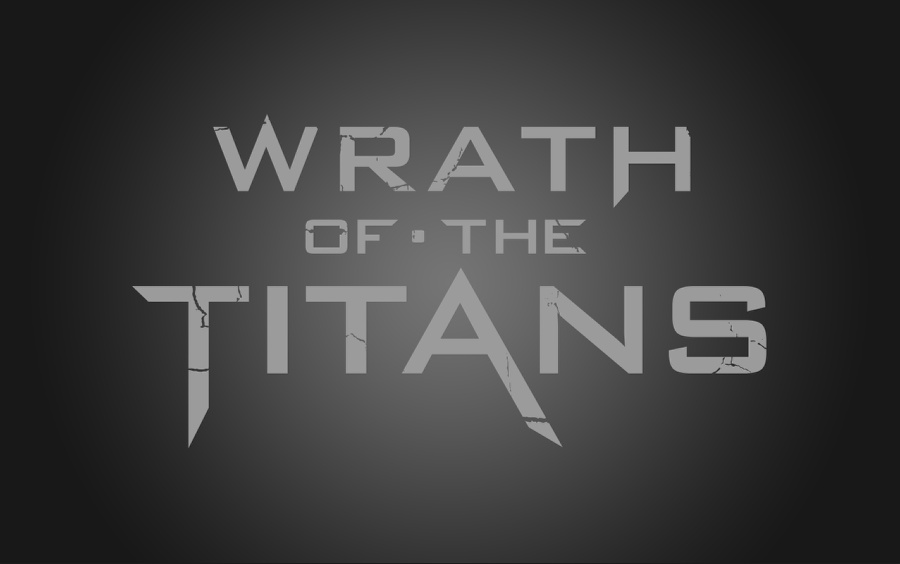
Copy the text from Illustrator and paste it Photoshop. Just make sure to have a light grey for the color of the text.
Wrath of the Titans in Photoshop CS6

Step 4

In order to add some cracks and deformations on the logo we will use an image for reference. The one I am using is from Roberto Castillo entitled Cracked Set. Courtesy of Shutterstock.
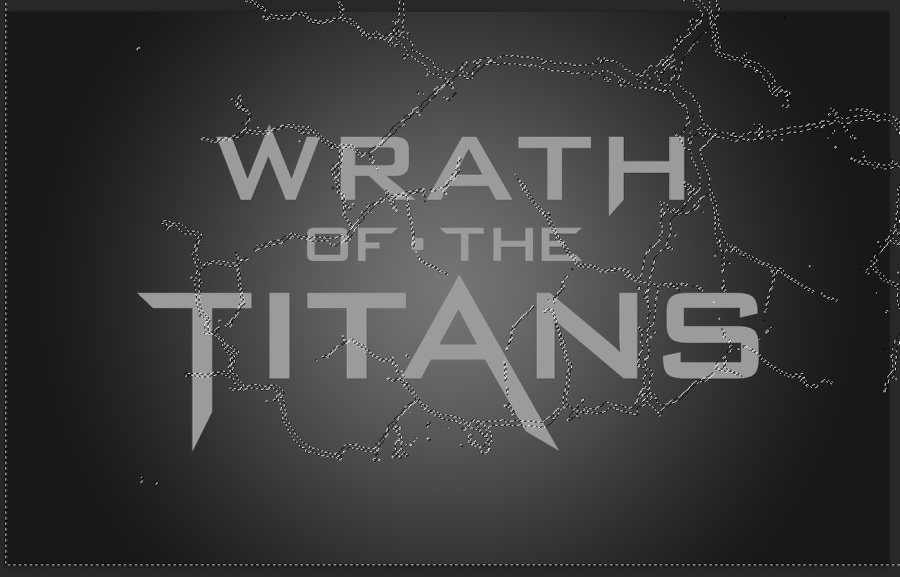
Just import the image and place it on top of the logo. Try to find a position that doesn't destroy the logo that much. Then just create a marquee selection of the cracks.
Wrath of the Titans in Photoshop CS6

Step 5

With the logo layer selected go to Layer>Mask>Hide Selection. You will have an effect like the image below.
Wrath of the Titans in Photoshop CS6

Step 6

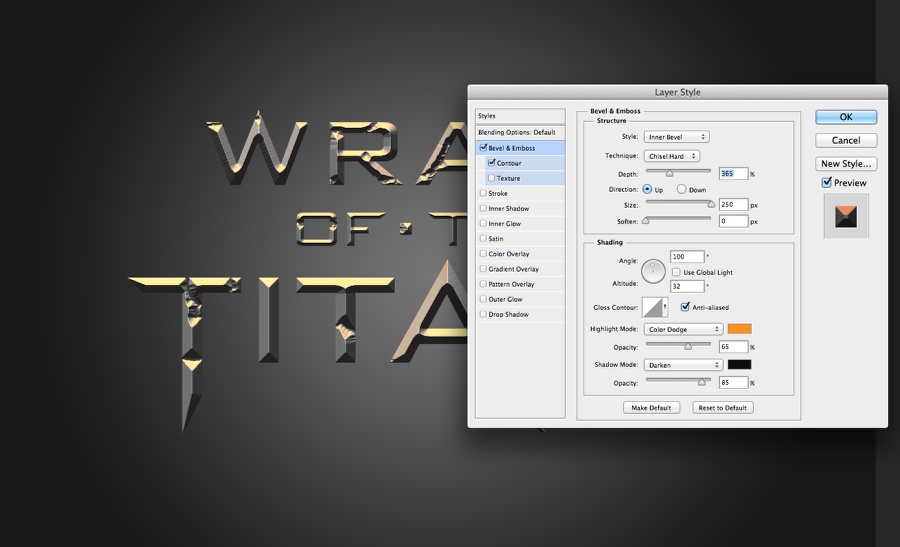
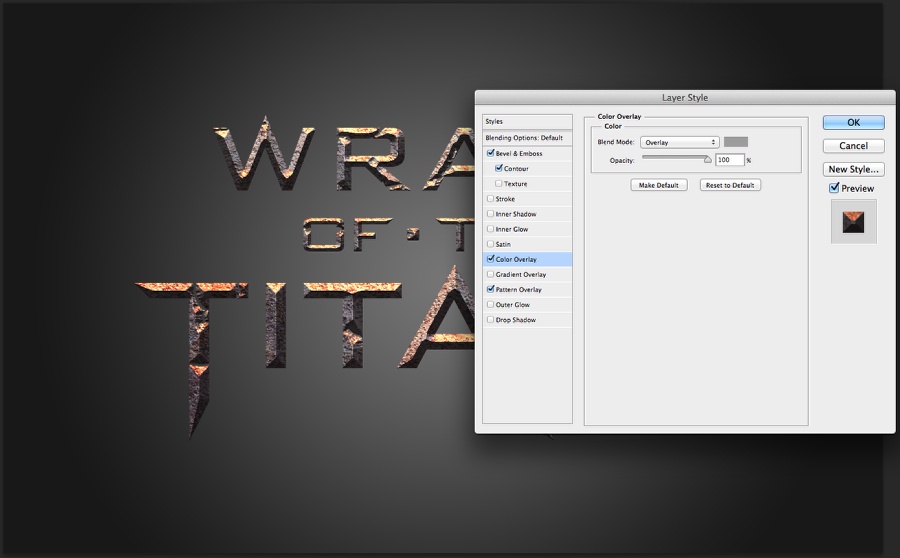
Time to play with Layer Styles. WIth the logo selected go to Layer>Layer Styles>Bevel and Emboss. Select Inner Bevel for the Style, Chisel Hard for the Technique, 365% for the Depth, 250 pixels for the SIze, 0 for Softness, 100º for the Angle, 32º for the Altitude. For the Highlight Mode use Color Dodge with orange at 65%. For the Shadow Mode use Darken with Black at 85%
Wrath of the Titans in Photoshop CS6

Step 7

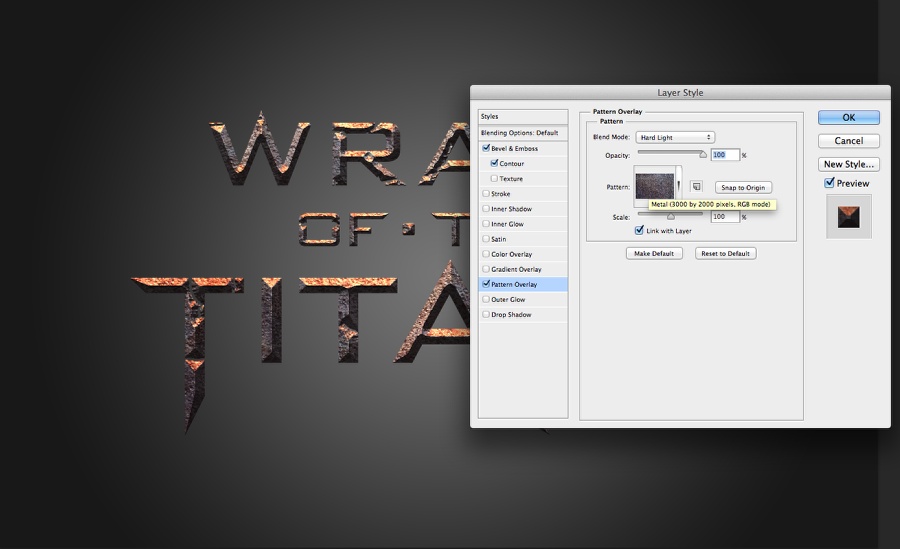
Select Pattern Overlay. Then we will use a custom texture. The one I used is courtesy of Shutterstock and it's entitled The surface of the old metal, visible rust by Supertrooper. Basically what you will do is open the file in Photoshop and go to Edit>Define Pattern. Name it "Meta". Back to the design. Select the texture you created for the pattern. Use Hard Light for the Blend Mode.
Wrath of the Titans in Photoshop CS6

Step 8

Select Color Overlay. Use grey with Overlay for the Blend Mode.
Wrath of the Titans in Photoshop CS6

Step 9

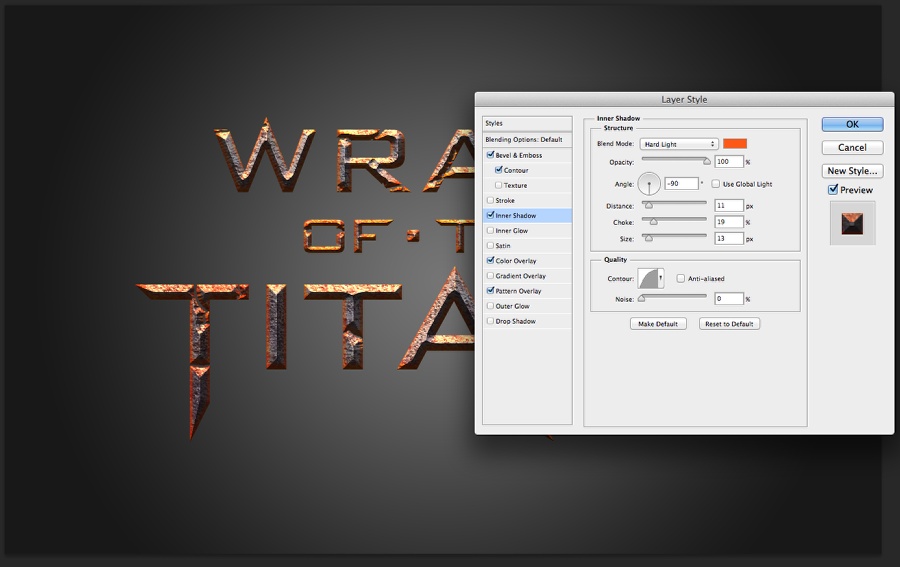
Select Inner Shadow. Use orange for the color with Hard Light for the Blend Mode. For the Angle use -90º with 11 pixel for the Distance, 20% for the Choke, 13 pixels for the Size and change the Contour for the same we are using in the image below.
Wrath of the Titans in Photoshop CS6

Step 10

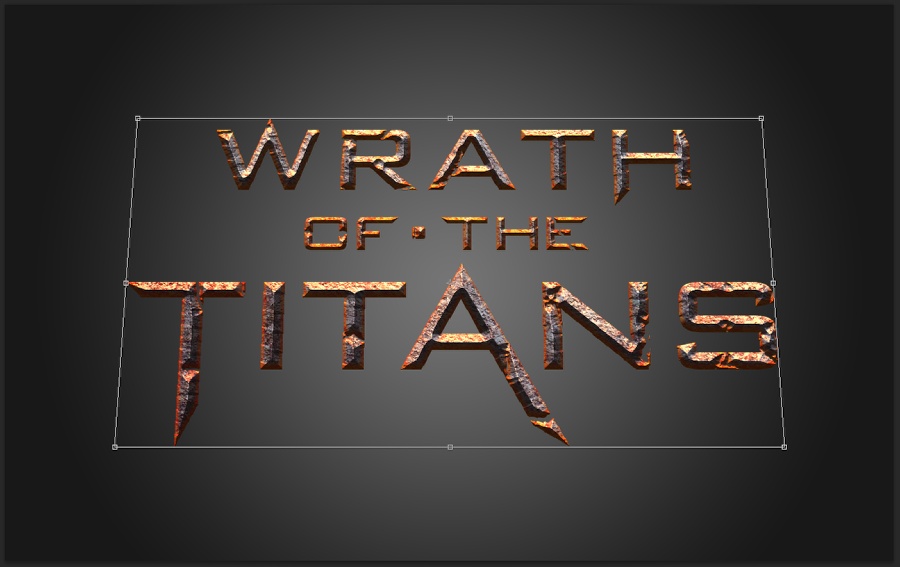
Go to Edit>Transform>Perspective. Add a little perspective like the image below.
Wrath of the Titans in Photoshop CS6

Step 11

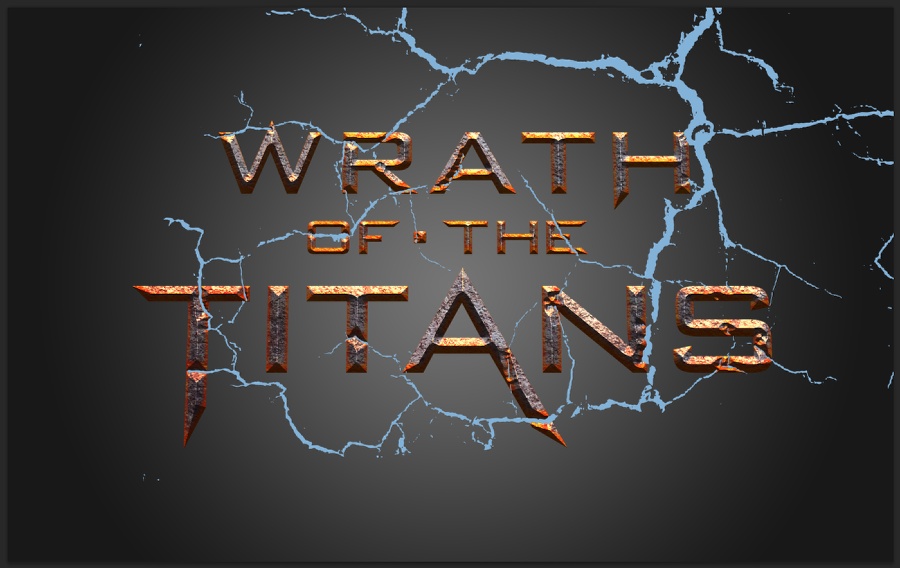
Back with the cracks from the step 4. Make it visible and then create a marquee selection of the logo.
Wrath of the Titans in Photoshop CS6

Step 12

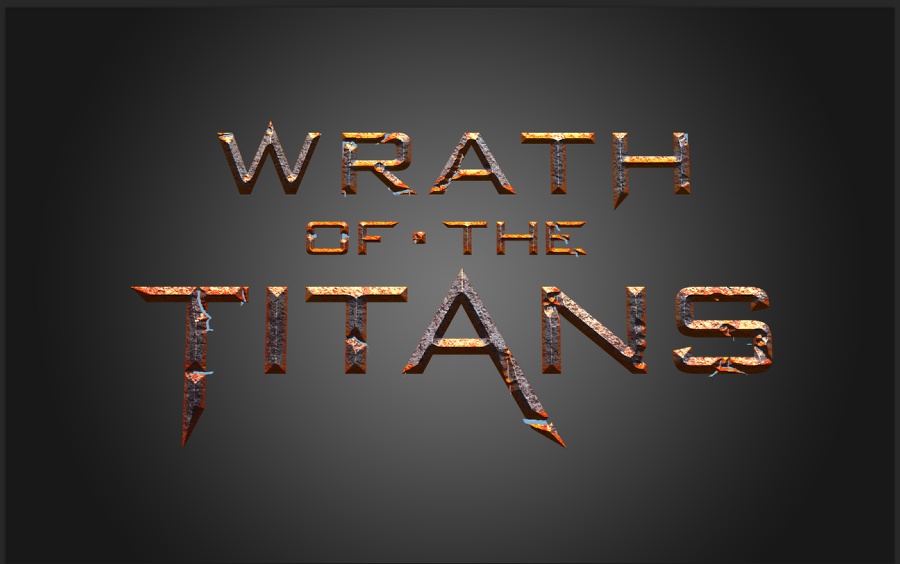
With the cracks layer selected go to Layer>Layer Mask>Reveal Selection. The blue cracks will be visible on top of the areas we deformed on the step 2.
Wrath of the Titans in Photoshop CS6

Step 13

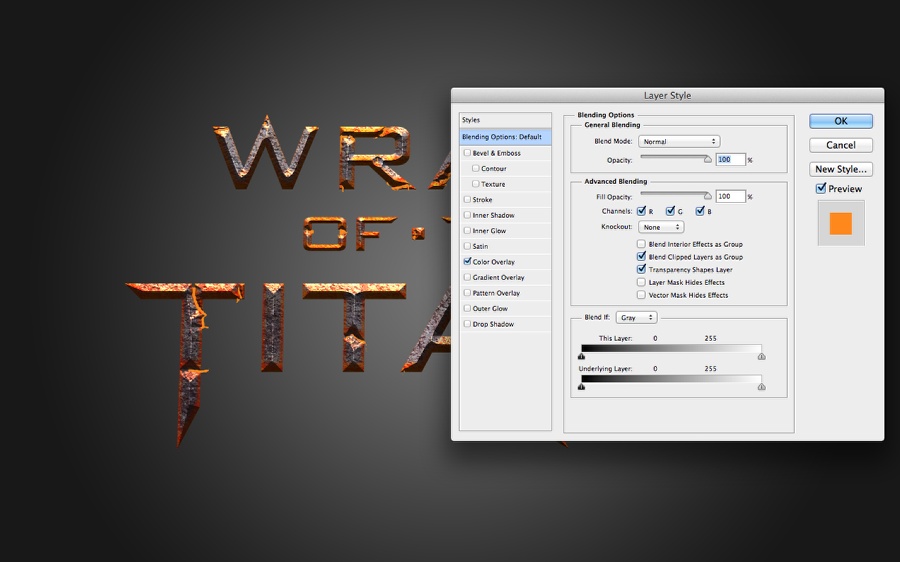
Now let's add some layer styles to the cracks to make the melting metal. Go to Layer>Layer Styles>Color Overlay. Use Orange for the color.
Wrath of the Titans in Photoshop CS6

Step 14

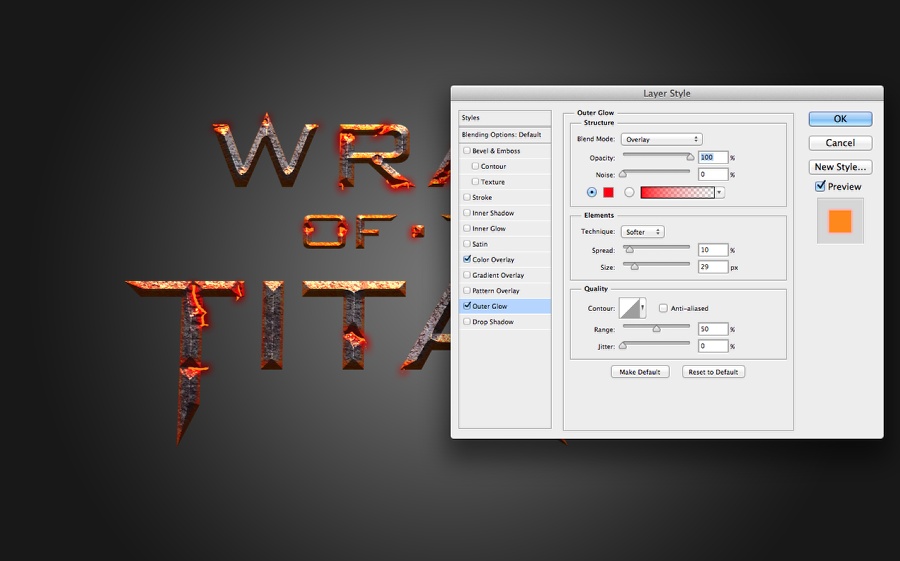
Select Outer Glow and then use Overlay for the Blend Mode with red for the color. For the Technique use Softer with 10% Spread and 30 pixels Size.
Wrath of the Titans in Photoshop CS6

Step 15

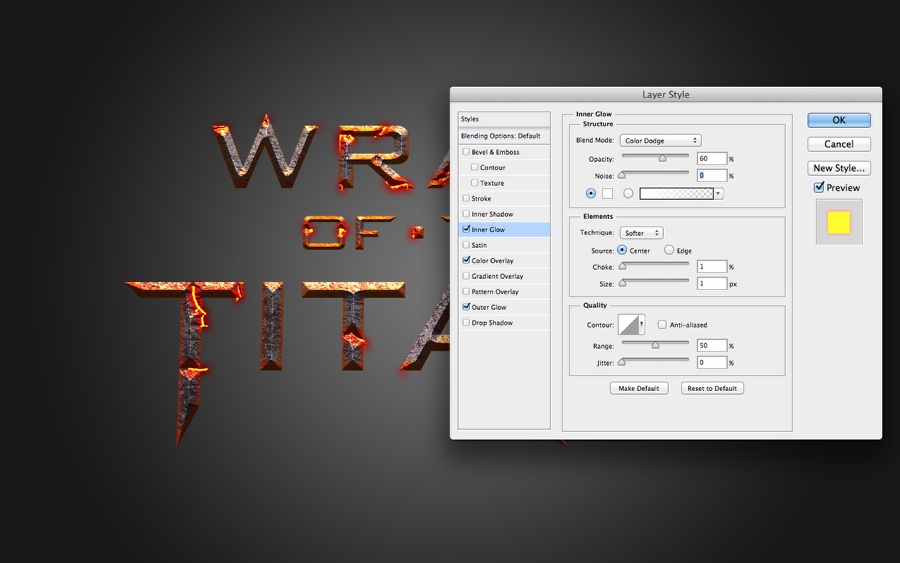
Select Inner Glow. Use Color Dodge for the Blend Mode, 60% for the Opacity, white for the color. For the elements use center with 1 for Choke and Size.
Wrath of the Titans in Photoshop CS6

Step 16

Duplicate the layer so the effect is a bit stronger.
Wrath of the Titans in Photoshop CS6

Step 16

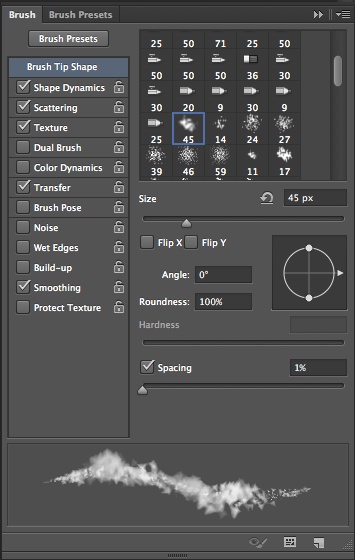
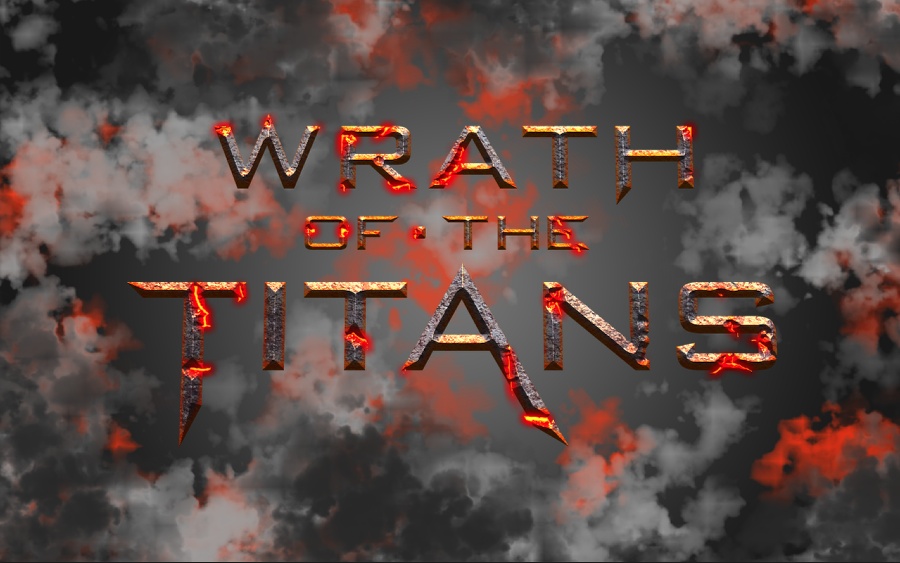
Let's create a brush now so we can add some nice smoke effects. Go to Window>Brush. Select the Cloud tip preset. Change the Spacing to 1%
Wrath of the Titans in Photoshop CS6

Step 17

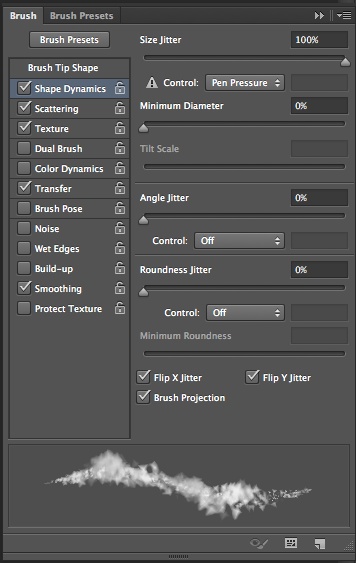
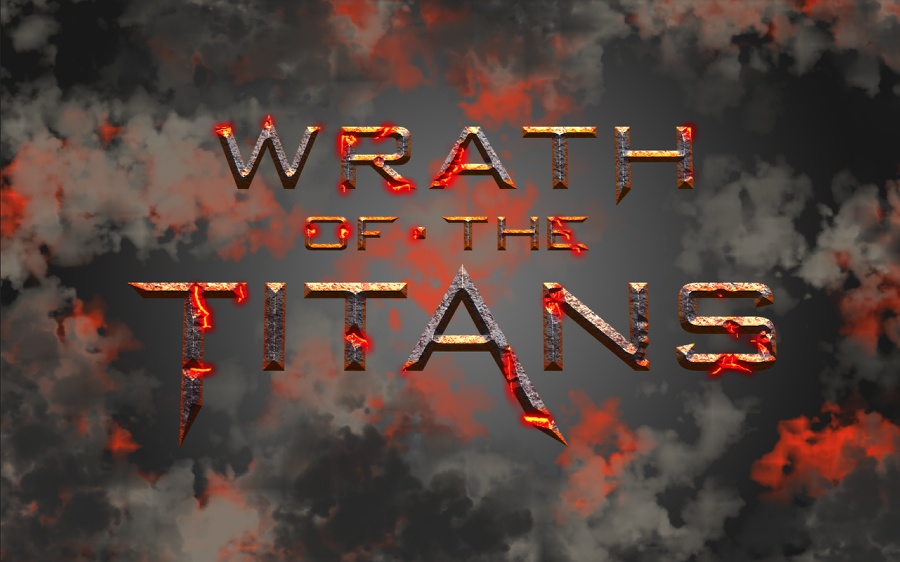
Select the Shape Dynamics. Use the image below for the values.
Wrath of the Titans in Photoshop CS6

Step 18

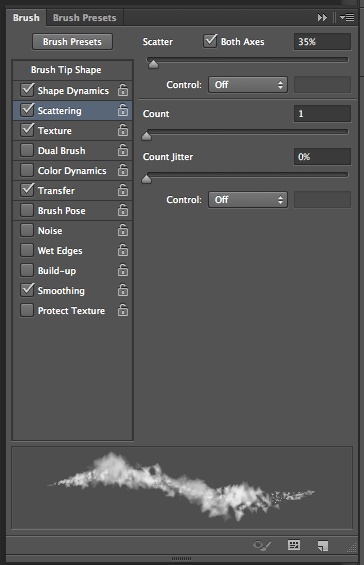
Select the Scattering and use the image below for the values.
Wrath of the Titans in Photoshop CS6

Step 19

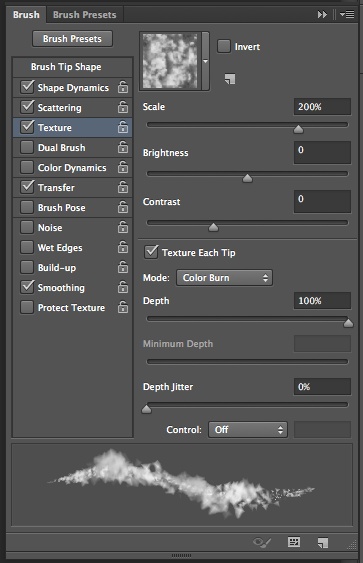
Select Texture. The for the Pattern select the Cloud one. Also change the Scale to 200% and the mode to Color Burn.
Wrath of the Titans in Photoshop CS6

Step 20

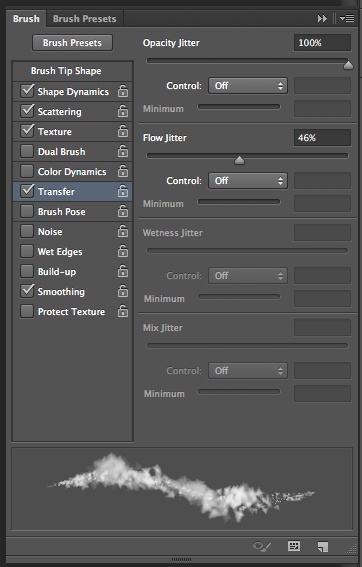
Select Transfer and change the Opacity Jitter to 100%.
Wrath of the Titans in Photoshop CS6

Step 21

Add a new layer on top of the background. Use the Brush Tool (B) with the brush you have just created to paint some clouds. Use grey for the color.
Wrath of the Titans in Photoshop CS6

Step 22

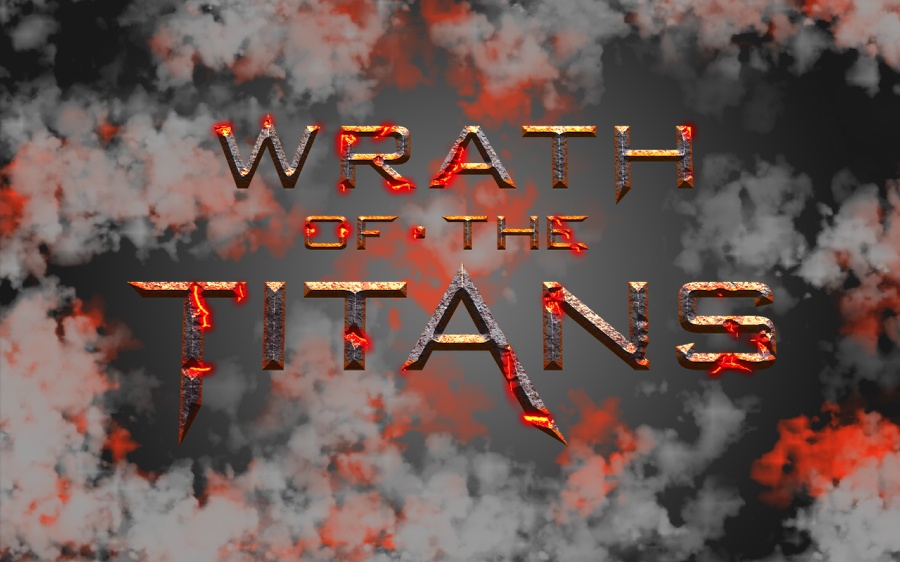
Add another layer, this time underneath the previous one. The still with the Brush Tool and the brush you created. Paint some red clouds.
Wrath of the Titans in Photoshop CS6

Step 23

Repeat the same process, this time to create some black clouds on top of the others.
Wrath of the Titans in Photoshop CS6

Step 24

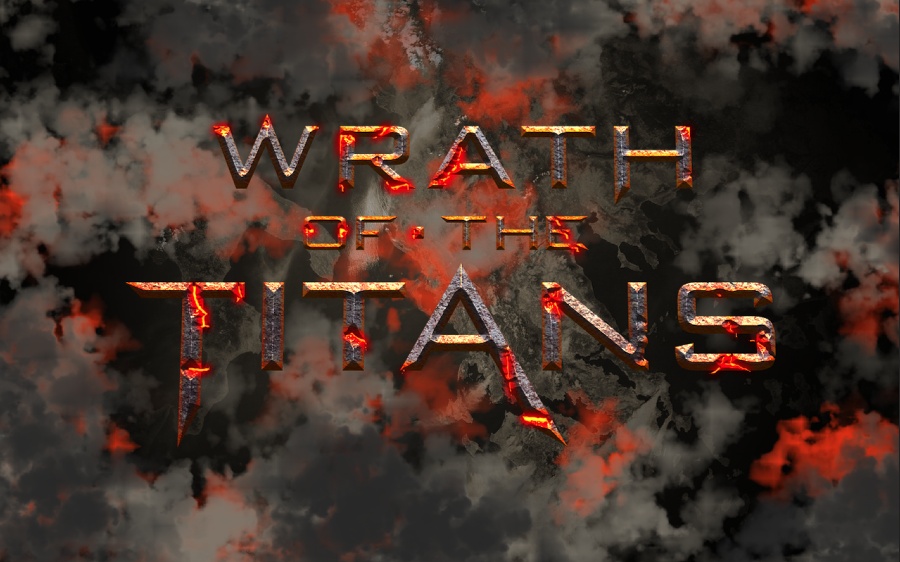
Add a layer on top of the grey clouds one. Then fill it with brown #574f41. Then change the Blend Mode to Overlay.
Wrath of the Titans in Photoshop CS6

Step 25

Now let's add a nice Google Map satelite view. I print screen a map from greece. Put underneath all the other layers, but on top of the background one.
Wrath of the Titans in Photoshop CS6

Step 26

Go to Image>Saturation>Hue and Saturation. Change the Hue to 40 and the saturation to 15.
Wrath of the Titans in Photoshop CS6

Step 27

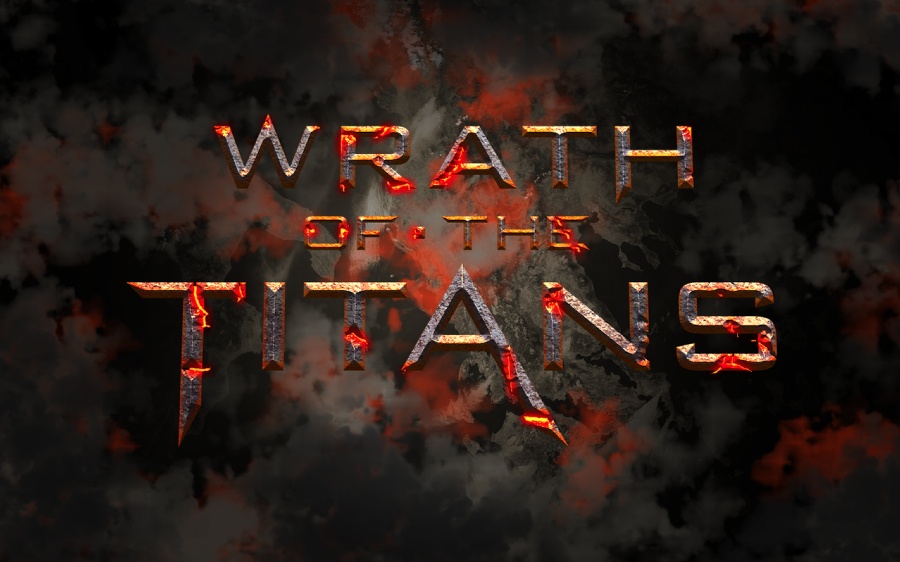
Add a layer on top of the clouds but underneath the text effect. Then fill it with a radial gradient from black to white in the center. Change the Blend Mode to Multiply at 80% Opacity to create a Vignette Effect.
Wrath of the Titans in Photoshop CS6

Step 28

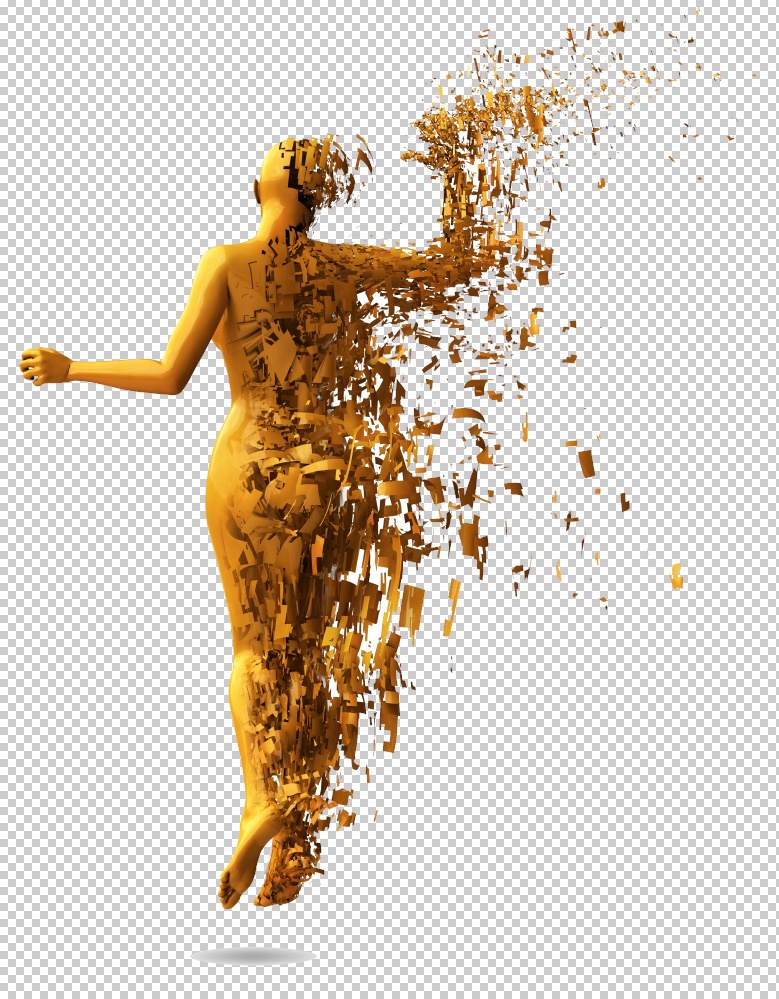
To create some nice shatters on our text effect we will use another image to get the assets from. The one I am using is courtesy of Shutterstock and can be found here http://www.shutterstock.com/pic-73243228/stock-photo-abstract-character-...
Wrath of the Titans in Photoshop CS6

Step 29

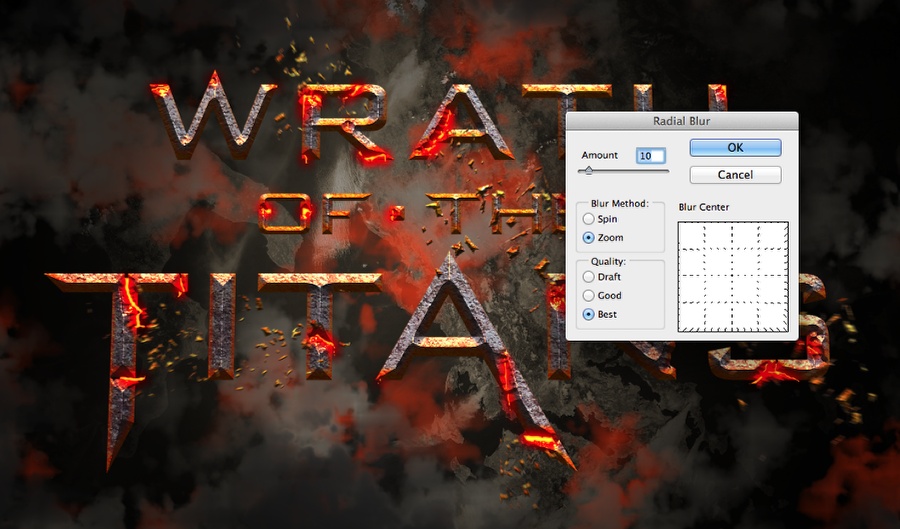
Copy some shatters from the stock image and paste in the document. Position them on the areas that we deformed the text. Just copy the layer style from the logo and apply to them. You can change the inner shadow a bit so they won't be so yellow. After that merge all layers with shatters into one and go to Filter>Blur>Radial Blur. Use 10 for the Amount, Zoom for the Blur Method and Best for the Quality.
Wrath of the Titans in Photoshop CS6

Step 30

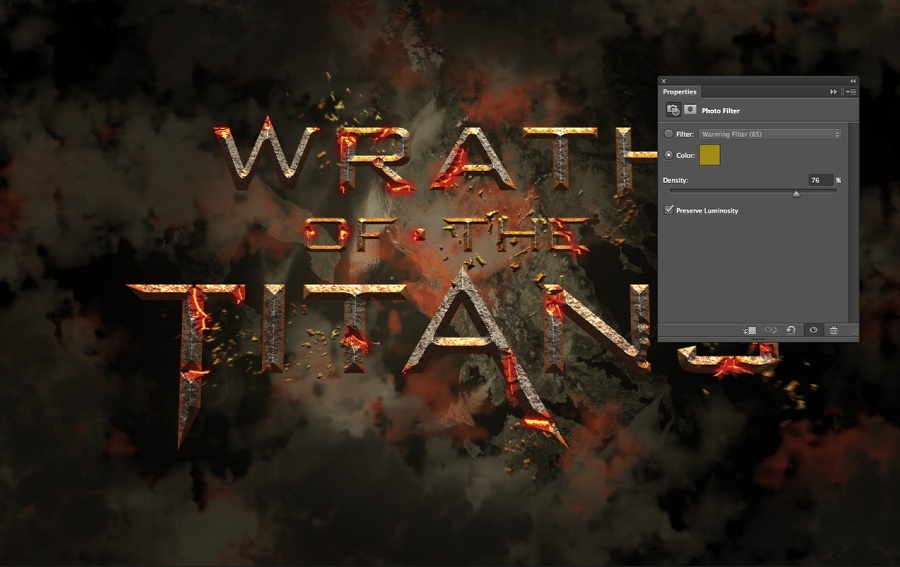
Go to Layer>New Adjustment Layer>Photo Filter. Use a dark yellow with 75% Density on top of the other layers.
Wrath of the Titans in Photoshop CS6

Step 31

Select all layers and duplicate them. Group all the new layers into one so you will have a layer with your composotion. Go to Filter>Blur>Radial Blur. Use the same settings as on the Step 29.
Wrath of the Titans in Photoshop CS6

Conclusion

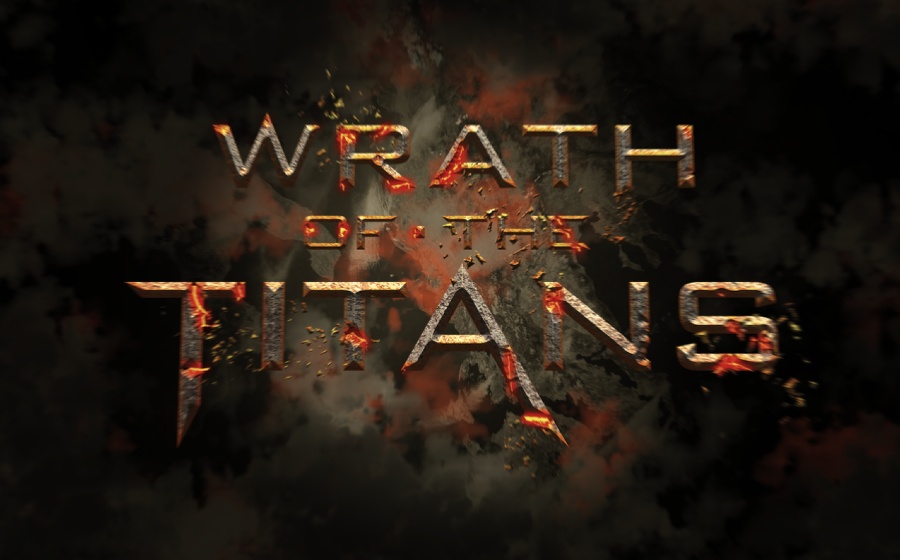
Duplicate the previous layer and then go to Filter>Blur>Gaussian Blur. Use 8 pixels for the Radius and then change the Blend Mode to Screen with 50% Opacity. Your design will be done by now.
As you can see the process wasn't based on new techiques but on how to reuse them to create the effect we wanted. Using the tools will be always like that. Tweaking and evolving techniques.
Wrath of the Titans in Photoshop CS6