Step 1
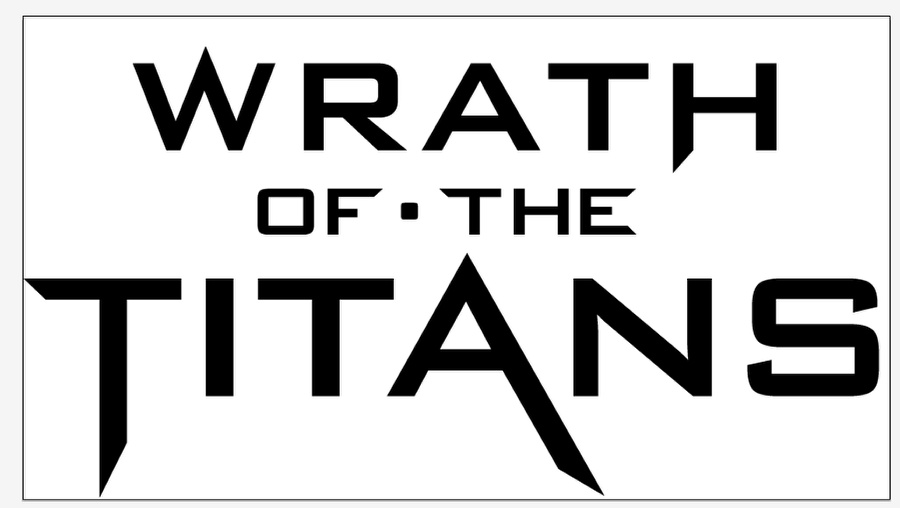
First thing to do is to get the text right. To do that is pretty
easy, we have already showed a tutorial on how to make the Clash of the
Titans logo, so you can just follow that at http://webtutorextreme.blogspot.in/2012/07/movie-poster-1-text-effect-in-photoshop.html

Just import the image and place it on top of the logo. Try to find a position that doesn't destroy the logo that much. Then just create a marquee selection of the cracks.


As you can see the process wasn't based on new techiques but on how to reuse them to create the effect we wanted. Using the tools will be always like that. Tweaking and evolving techniques.
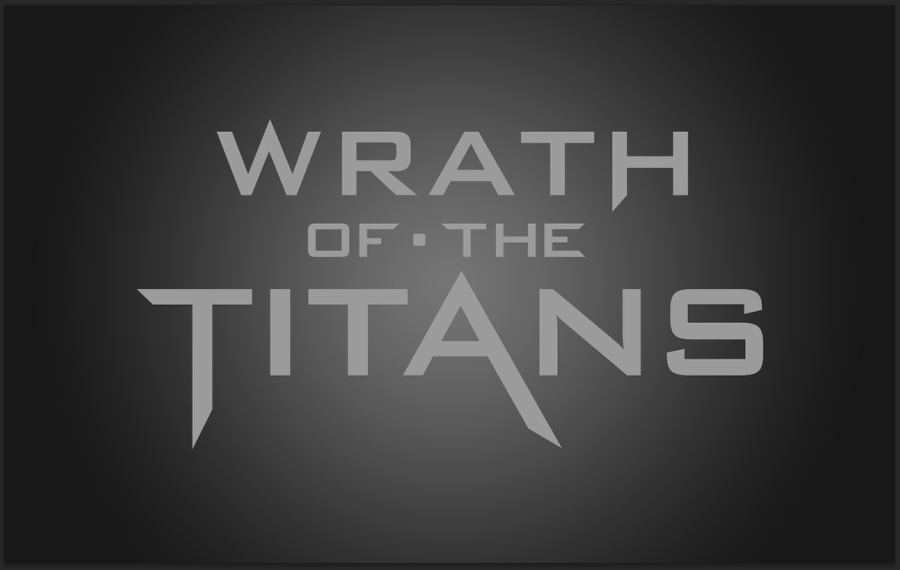
Step 2
Now in Photoshop, create a new document and fill the background layer with a radial gradient from #181818 (dark) to #757575 (light).
Step 3
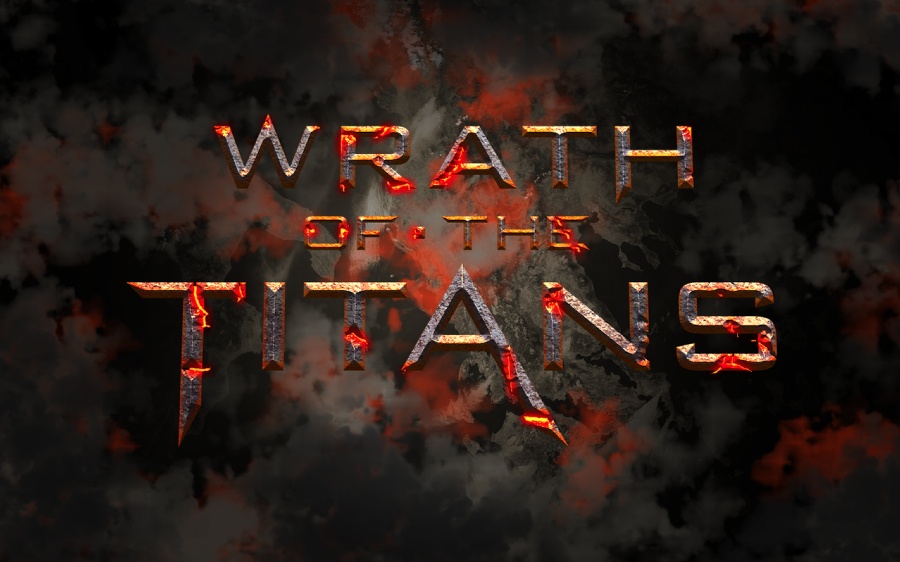
Copy the text from Illustrator and paste it Photoshop. Just make sure to have a light grey for the color of the text.
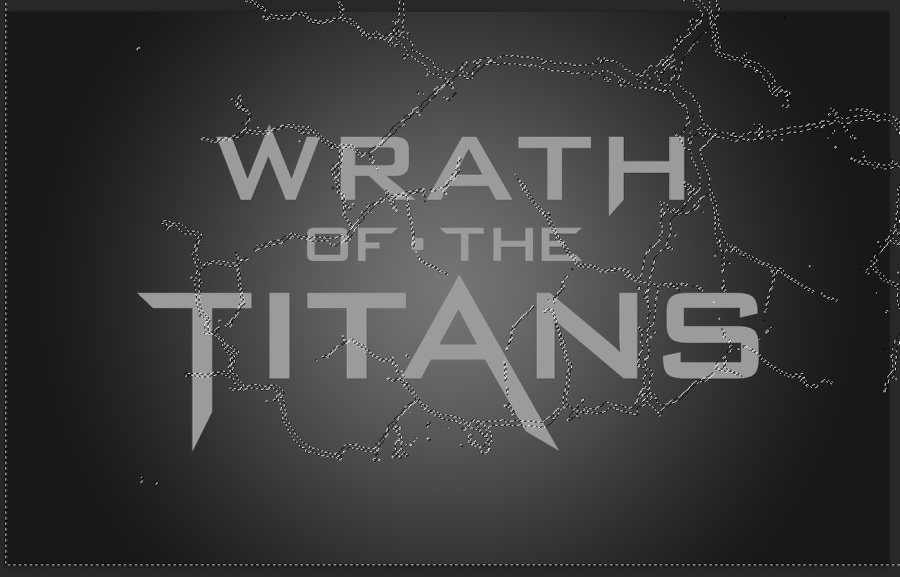
Step 4
In order to add some cracks and deformations on the logo we will use an image for reference. The one I am using is from Roberto Castillo entitled Cracked Set. Courtesy of Shutterstock.Just import the image and place it on top of the logo. Try to find a position that doesn't destroy the logo that much. Then just create a marquee selection of the cracks.
Step 5
With the logo layer selected go to Layer>Mask>Hide Selection. You will have an effect like the image below.
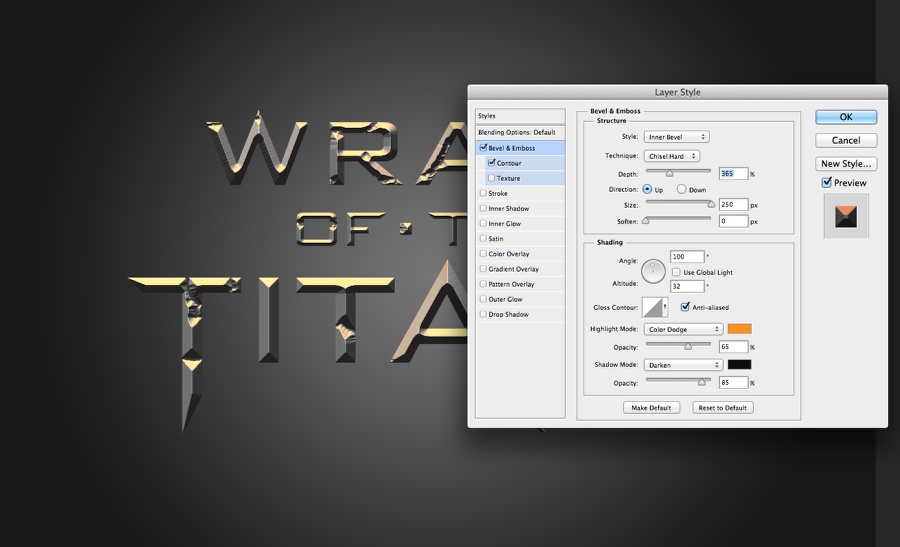
Step 6
Time to play with Layer Styles. WIth the logo selected go to Layer>Layer Styles>Bevel and Emboss. Select Inner Bevel for the Style, Chisel Hard for the Technique, 365% for the Depth, 250 pixels for the SIze, 0 for Softness, 100º for the Angle, 32º for the Altitude. For the Highlight Mode use Color Dodge with orange at 65%. For the Shadow Mode use Darken with Black at 85%
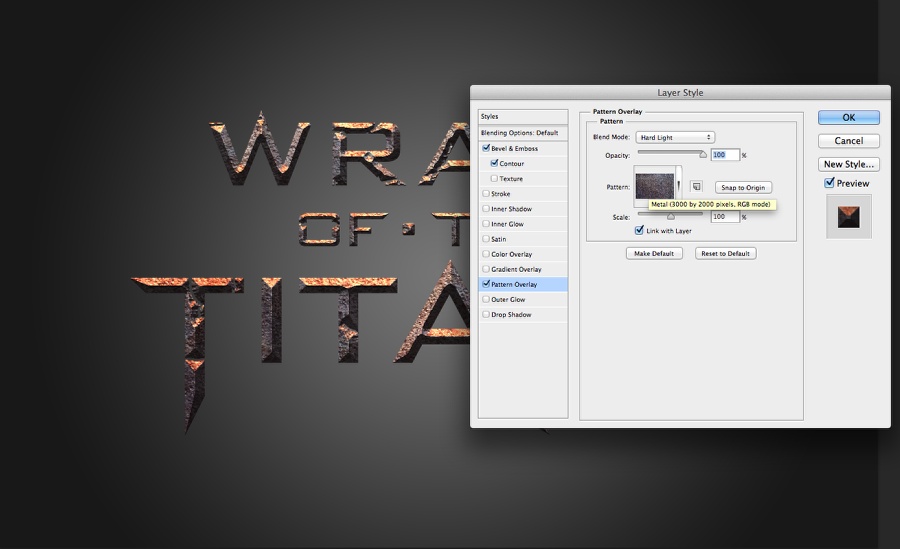
Step 7
Select Pattern Overlay. Then we will use a custom texture. The one I used is courtesy of Shutterstock and it's entitled The surface of the old metal, visible rust by Supertrooper. Basically what you will do is open the file in Photoshop and go to Edit>Define Pattern. Name it "Meta". Back to the design. Select the texture you created for the pattern. Use Hard Light for the Blend Mode.
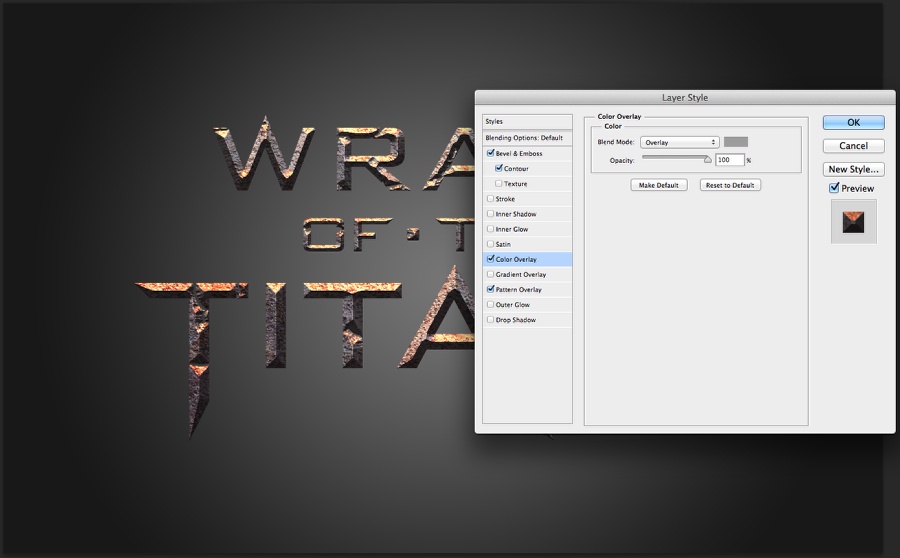
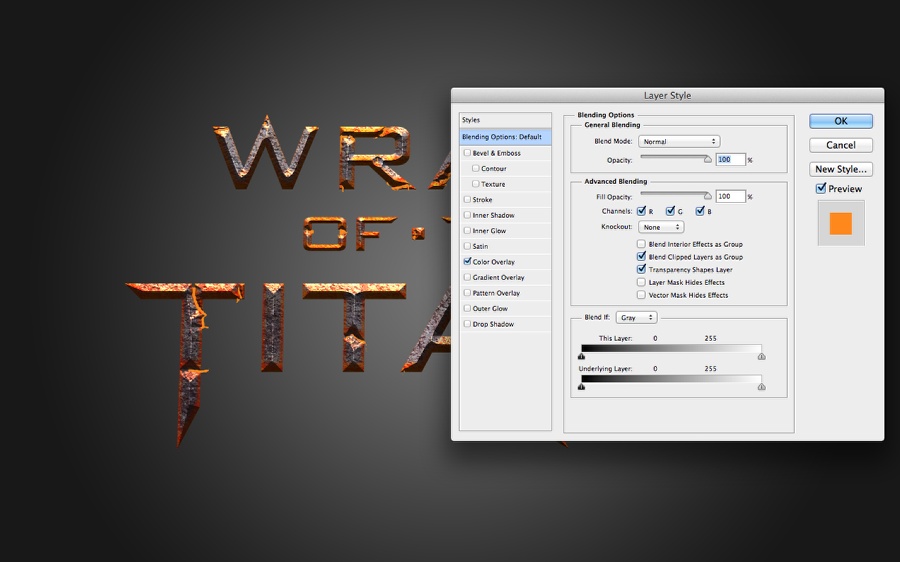
Step 8
Select Color Overlay. Use grey with Overlay for the Blend Mode.
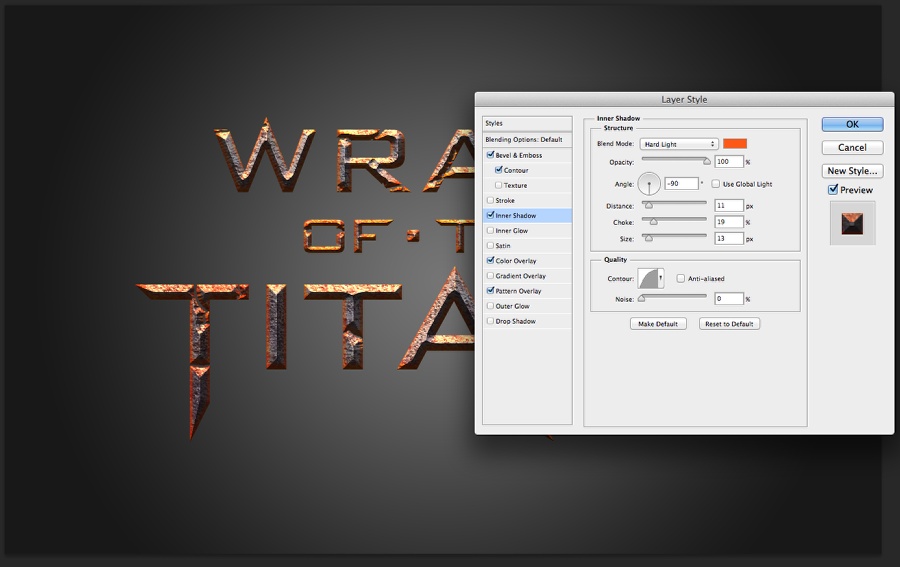
Step 9
Select Inner Shadow. Use orange for the color with Hard Light for the Blend Mode. For the Angle use -90º with 11 pixel for the Distance, 20% for the Choke, 13 pixels for the Size and change the Contour for the same we are using in the image below.
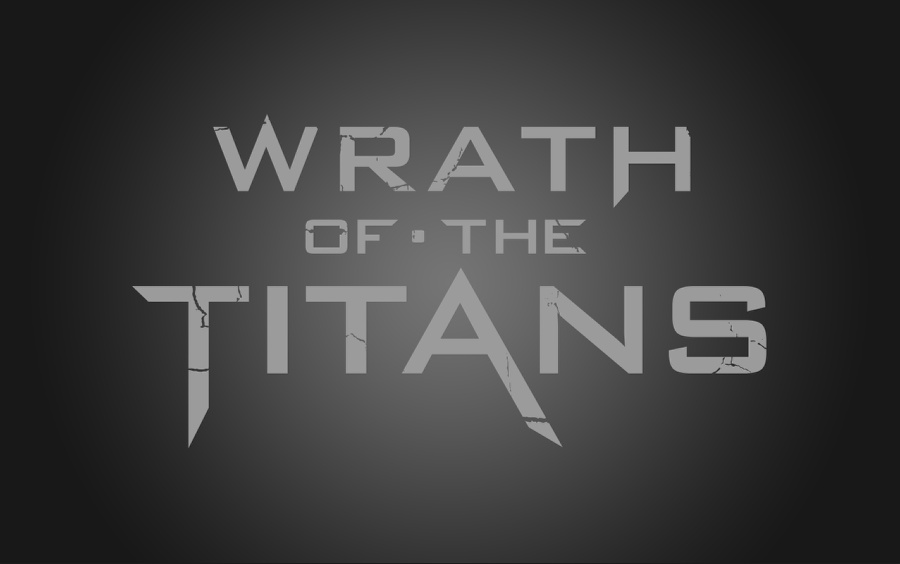
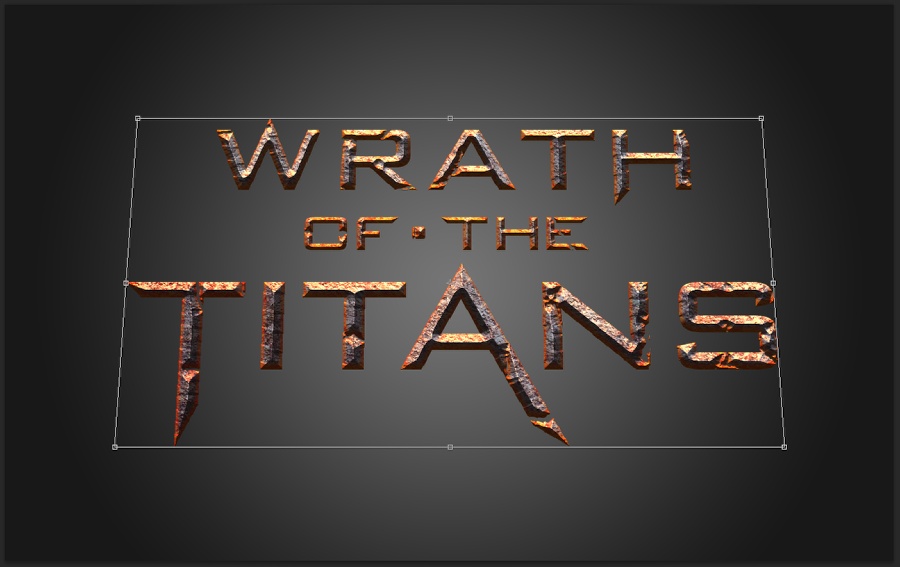
Step 10
Go to Edit>Transform>Perspective. Add a little perspective like the image below.
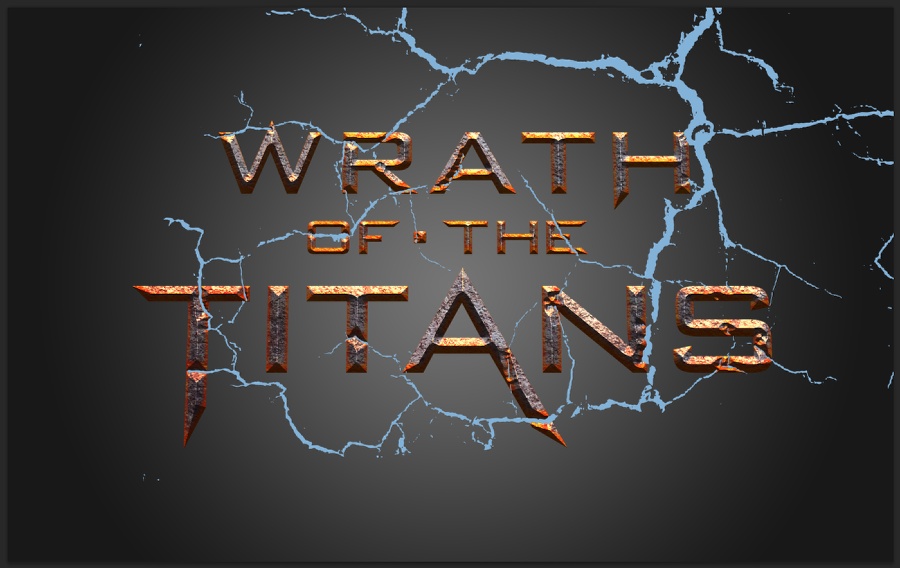
Step 11
Back with the cracks from the step 4. Make it visible and then create a marquee selection of the logo.
Step 12
With the cracks layer selected go to Layer>Layer Mask>Reveal Selection. The blue cracks will be visible on top of the areas we deformed on the step 2.
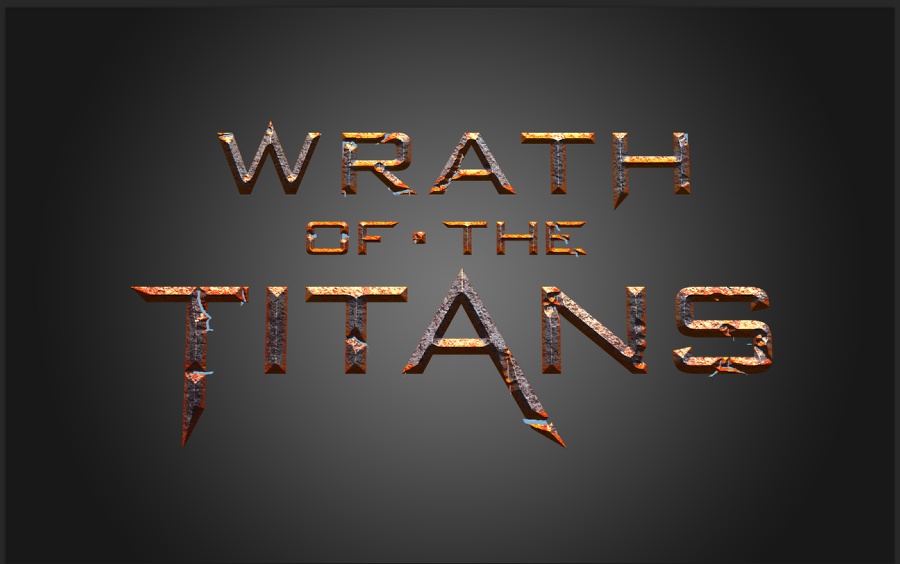
Step 13
Now let's add some layer styles to the cracks to make the melting metal. Go to Layer>Layer Styles>Color Overlay. Use Orange for the color.
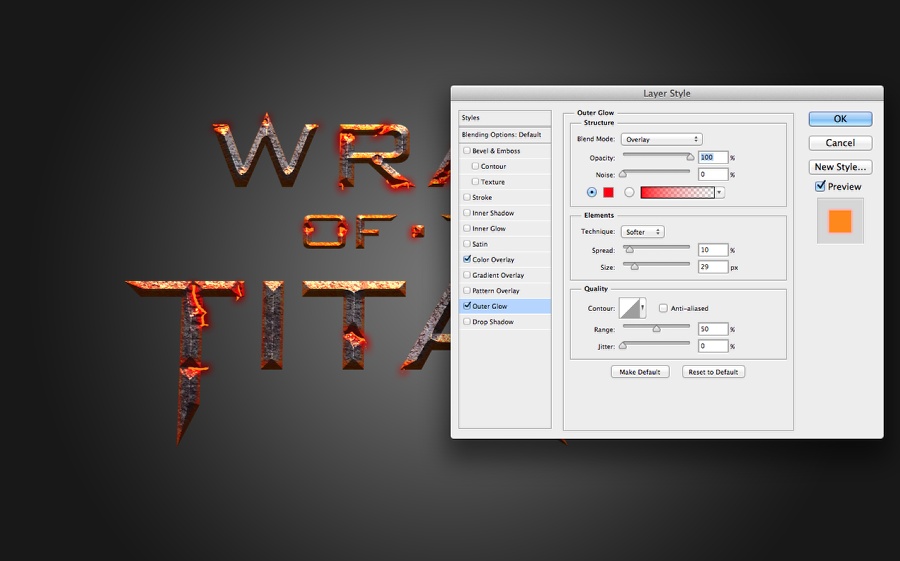
Step 14
Select Outer Glow and then use Overlay for the Blend Mode with red for the color. For the Technique use Softer with 10% Spread and 30 pixels Size.
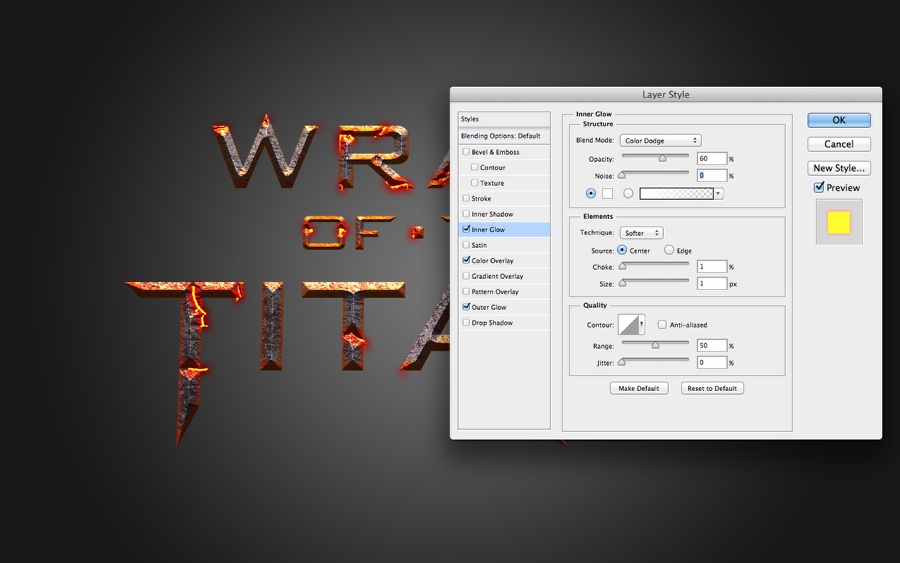
Step 15
Select Inner Glow. Use Color Dodge for the Blend Mode, 60% for the Opacity, white for the color. For the elements use center with 1 for Choke and Size.
Step 16
Duplicate the layer so the effect is a bit stronger.
Step 16
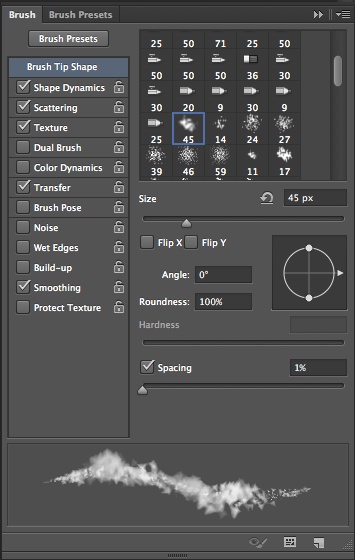
Let's create a brush now so we can add some nice smoke effects. Go to Window>Brush. Select the Cloud tip preset. Change the Spacing to 1%
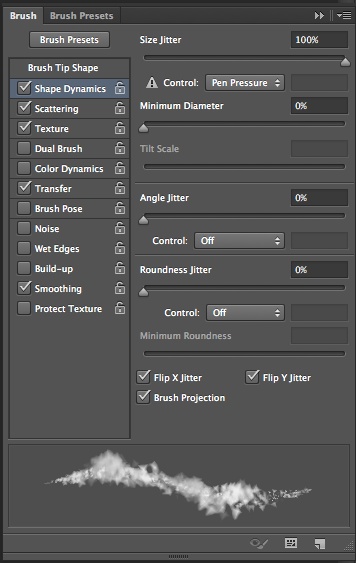
Step 17
Select the Shape Dynamics. Use the image below for the values.
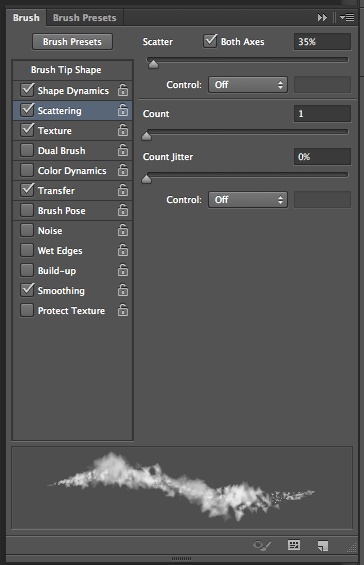
Step 18
Select the Scattering and use the image below for the values.
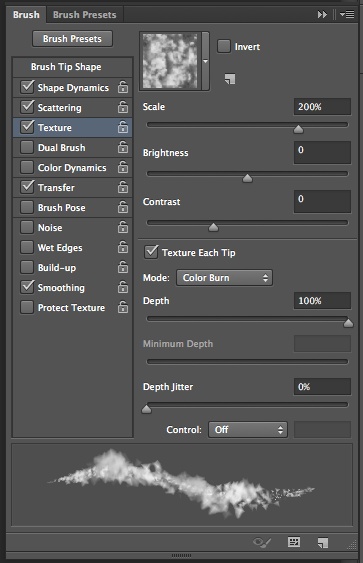
Step 19
Select Texture. The for the Pattern select the Cloud one. Also change the Scale to 200% and the mode to Color Burn.
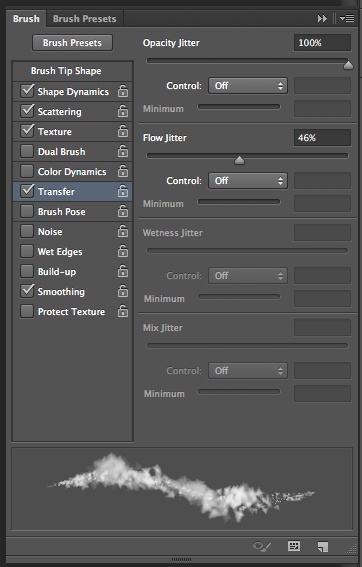
Step 20
Select Transfer and change the Opacity Jitter to 100%.
Step 21
Add a new layer on top of the background. Use the Brush Tool (B) with the brush you have just created to paint some clouds. Use grey for the color.
Step 22
Add another layer, this time underneath the previous one. The still with the Brush Tool and the brush you created. Paint some red clouds.
Step 23
Repeat the same process, this time to create some black clouds on top of the others.
Step 24
Add a layer on top of the grey clouds one. Then fill it with brown #574f41. Then change the Blend Mode to Overlay.
Step 25
Now let's add a nice Google Map satelite view. I print screen a map from greece. Put underneath all the other layers, but on top of the background one.
Step 26
Go to Image>Saturation>Hue and Saturation. Change the Hue to 40 and the saturation to 15.
Step 27
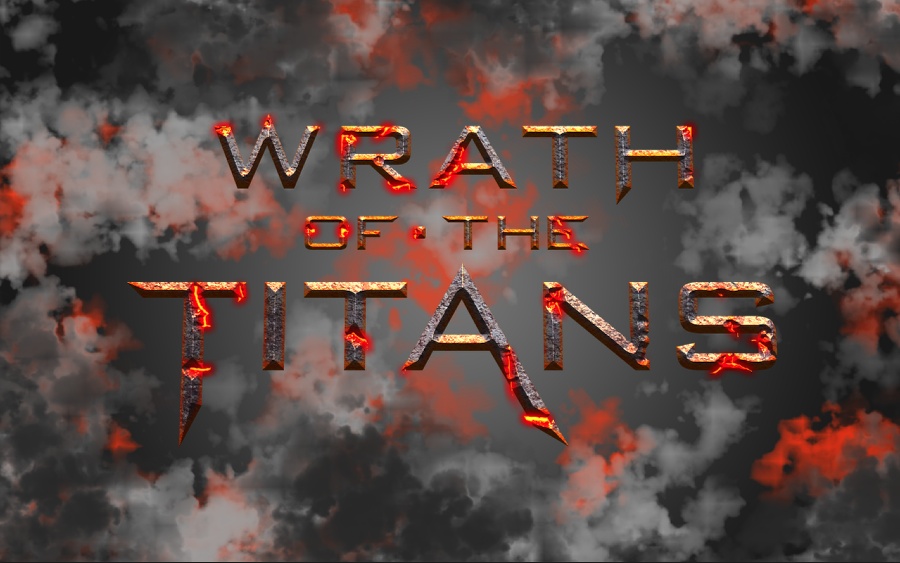
Add a layer on top of the clouds but underneath the text effect. Then fill it with a radial gradient from black to white in the center. Change the Blend Mode to Multiply at 80% Opacity to create a Vignette Effect.
Step 28
To create some nice shatters on our text effect we will use another image to get the assets from. The one I am using is courtesy of Shutterstock and can be found here http://www.shutterstock.com/pic-73243228/stock-photo-abstract-character-...
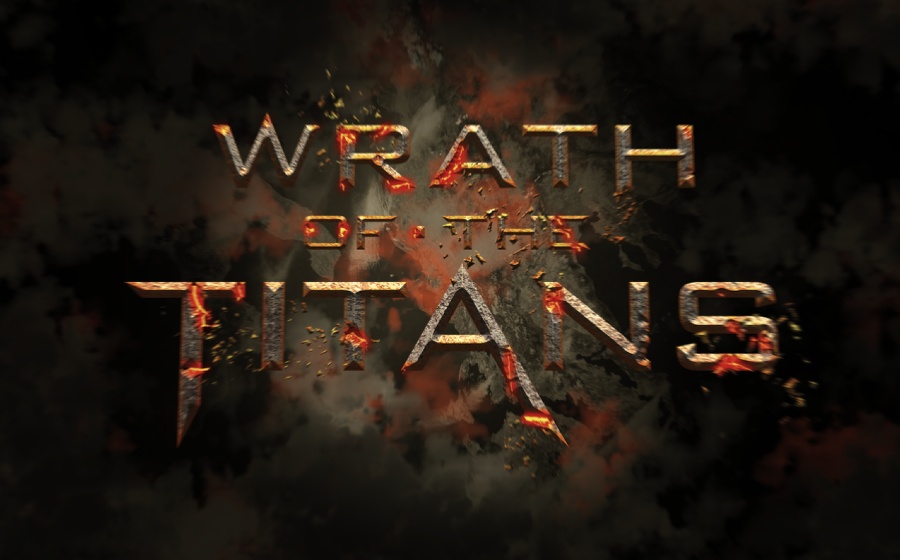
Step 29
Copy some shatters from the stock image and paste in the document. Position them on the areas that we deformed the text. Just copy the layer style from the logo and apply to them. You can change the inner shadow a bit so they won't be so yellow. After that merge all layers with shatters into one and go to Filter>Blur>Radial Blur. Use 10 for the Amount, Zoom for the Blur Method and Best for the Quality.
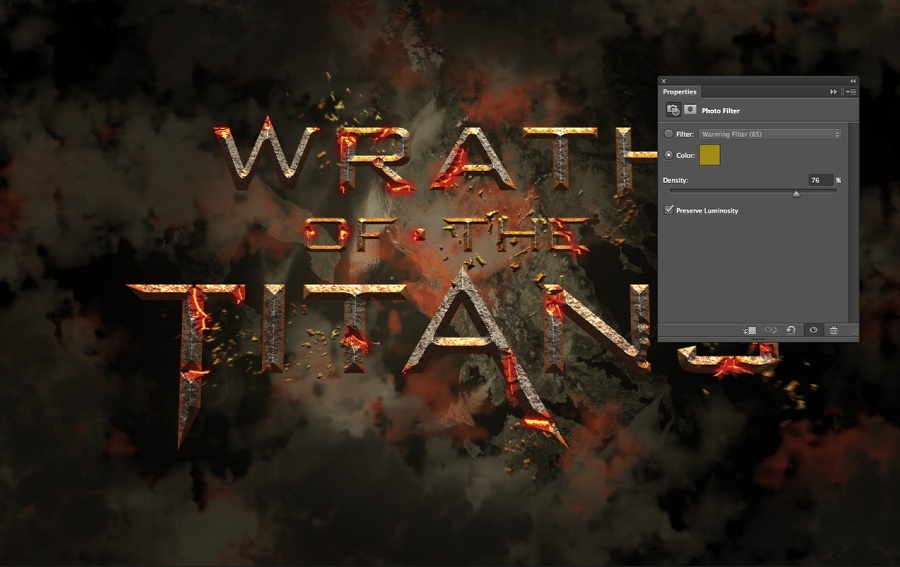
Step 30
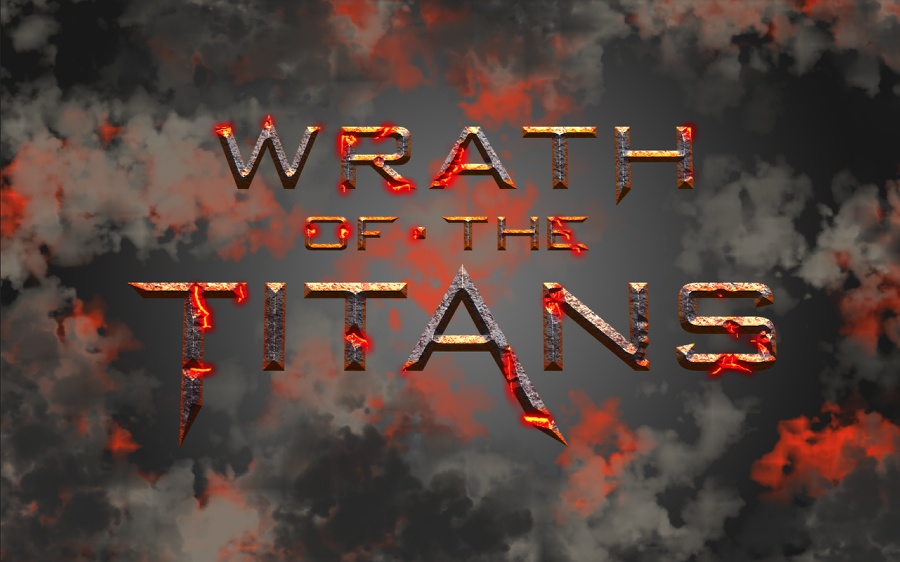
Go to Layer>New Adjustment Layer>Photo Filter. Use a dark yellow with 75% Density on top of the other layers.
Step 31
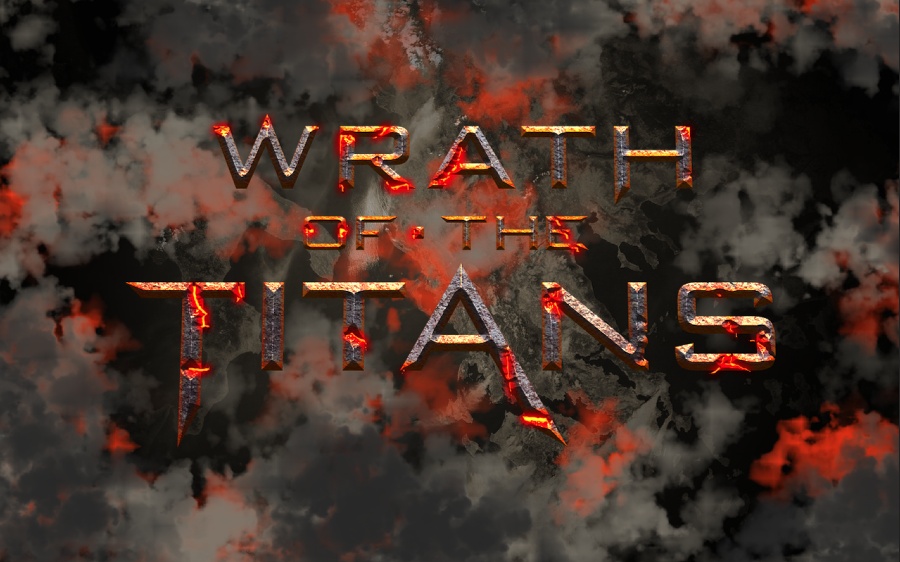
Select all layers and duplicate them. Group all the new layers into one so you will have a layer with your composotion. Go to Filter>Blur>Radial Blur. Use the same settings as on the Step 29.
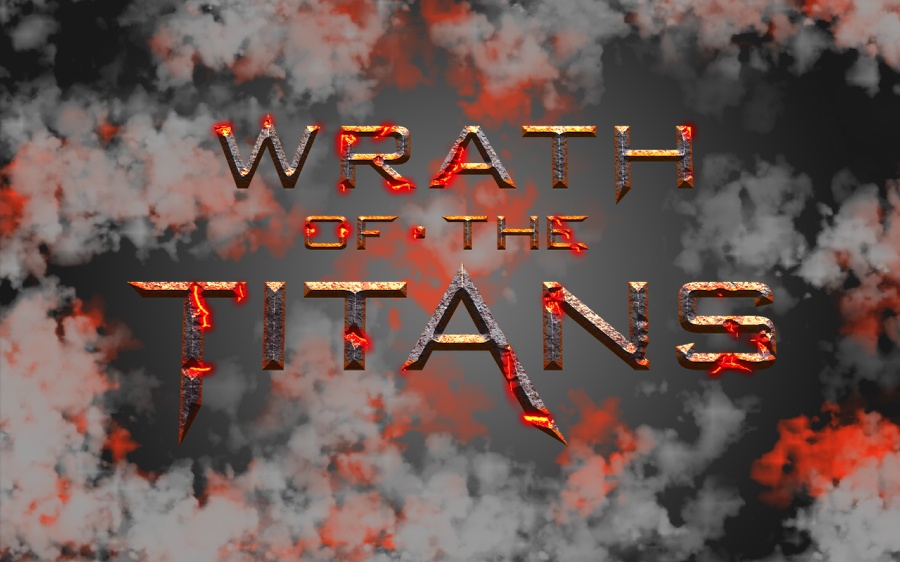
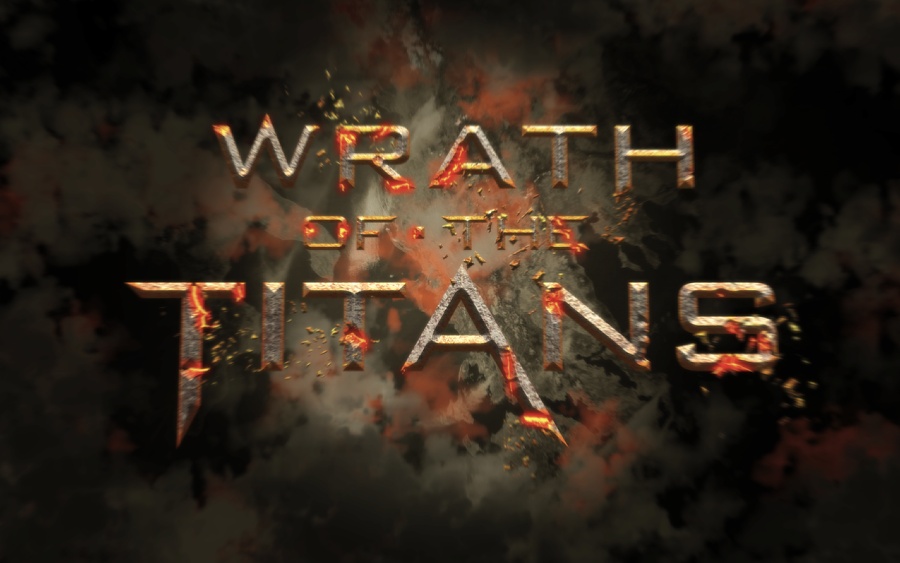
Conclusion
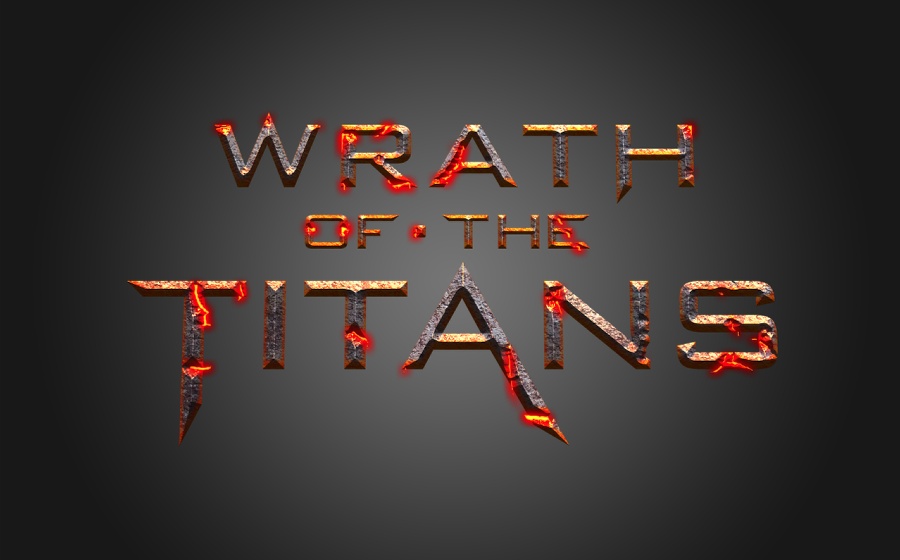
Duplicate the previous layer and then go to Filter>Blur>Gaussian Blur. Use 8 pixels for the Radius and then change the Blend Mode to Screen with 50% Opacity. Your design will be done by now.As you can see the process wasn't based on new techiques but on how to reuse them to create the effect we wanted. Using the tools will be always like that. Tweaking and evolving techniques.
No comments:
Post a Comment